Task Entries
In the Crisis Track mobile app, there are three task tabs that allow you to view different aspects of the task. This page focuses on what you can do in the Entries tab.
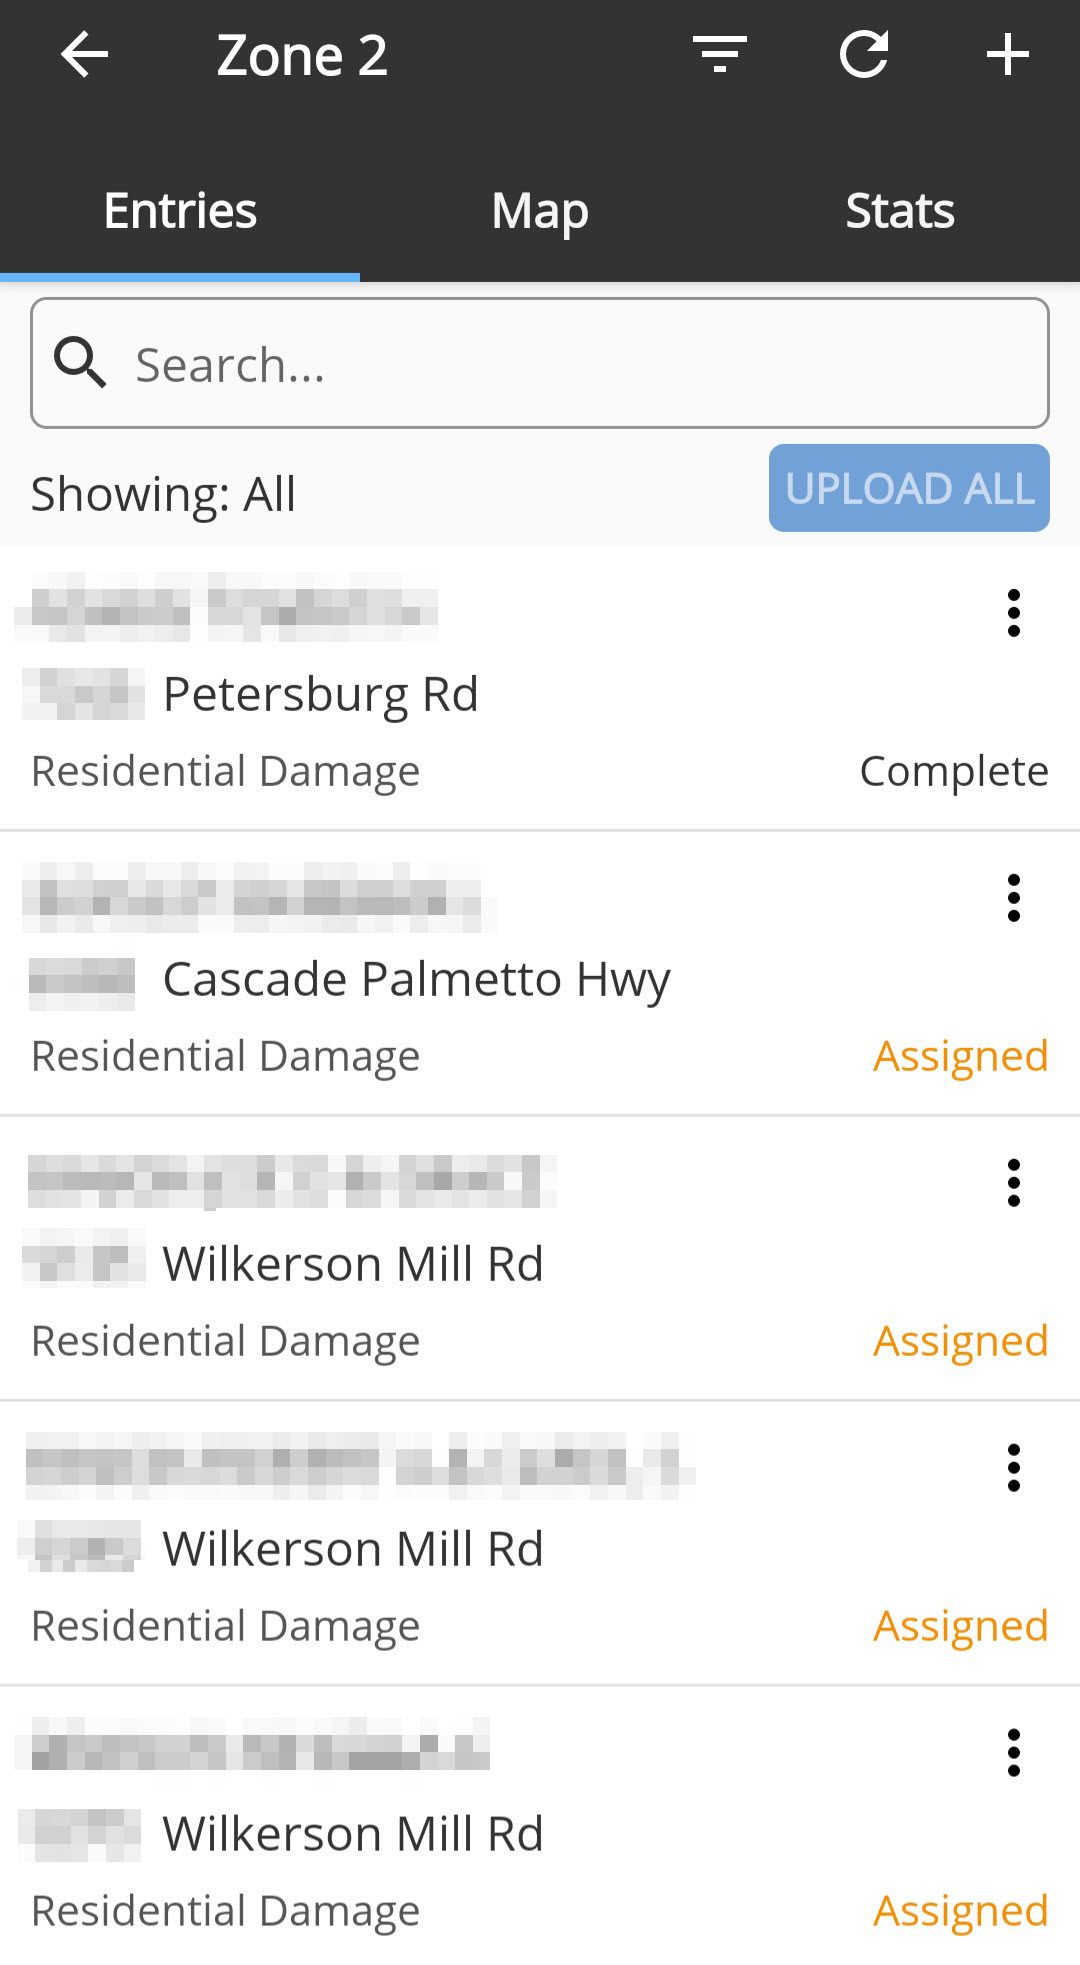
Tapping the + button allows you to create a blank entry using any of the forms that have been enabled by your administrator.
You can filter how entries are displayed using the filter menu ![]() above the list of entries. In the list of filters, you can also Show/Hide the Task Areas, Areas of Concern, and Annotations.
above the list of entries. In the list of filters, you can also Show/Hide the Task Areas, Areas of Concern, and Annotations.
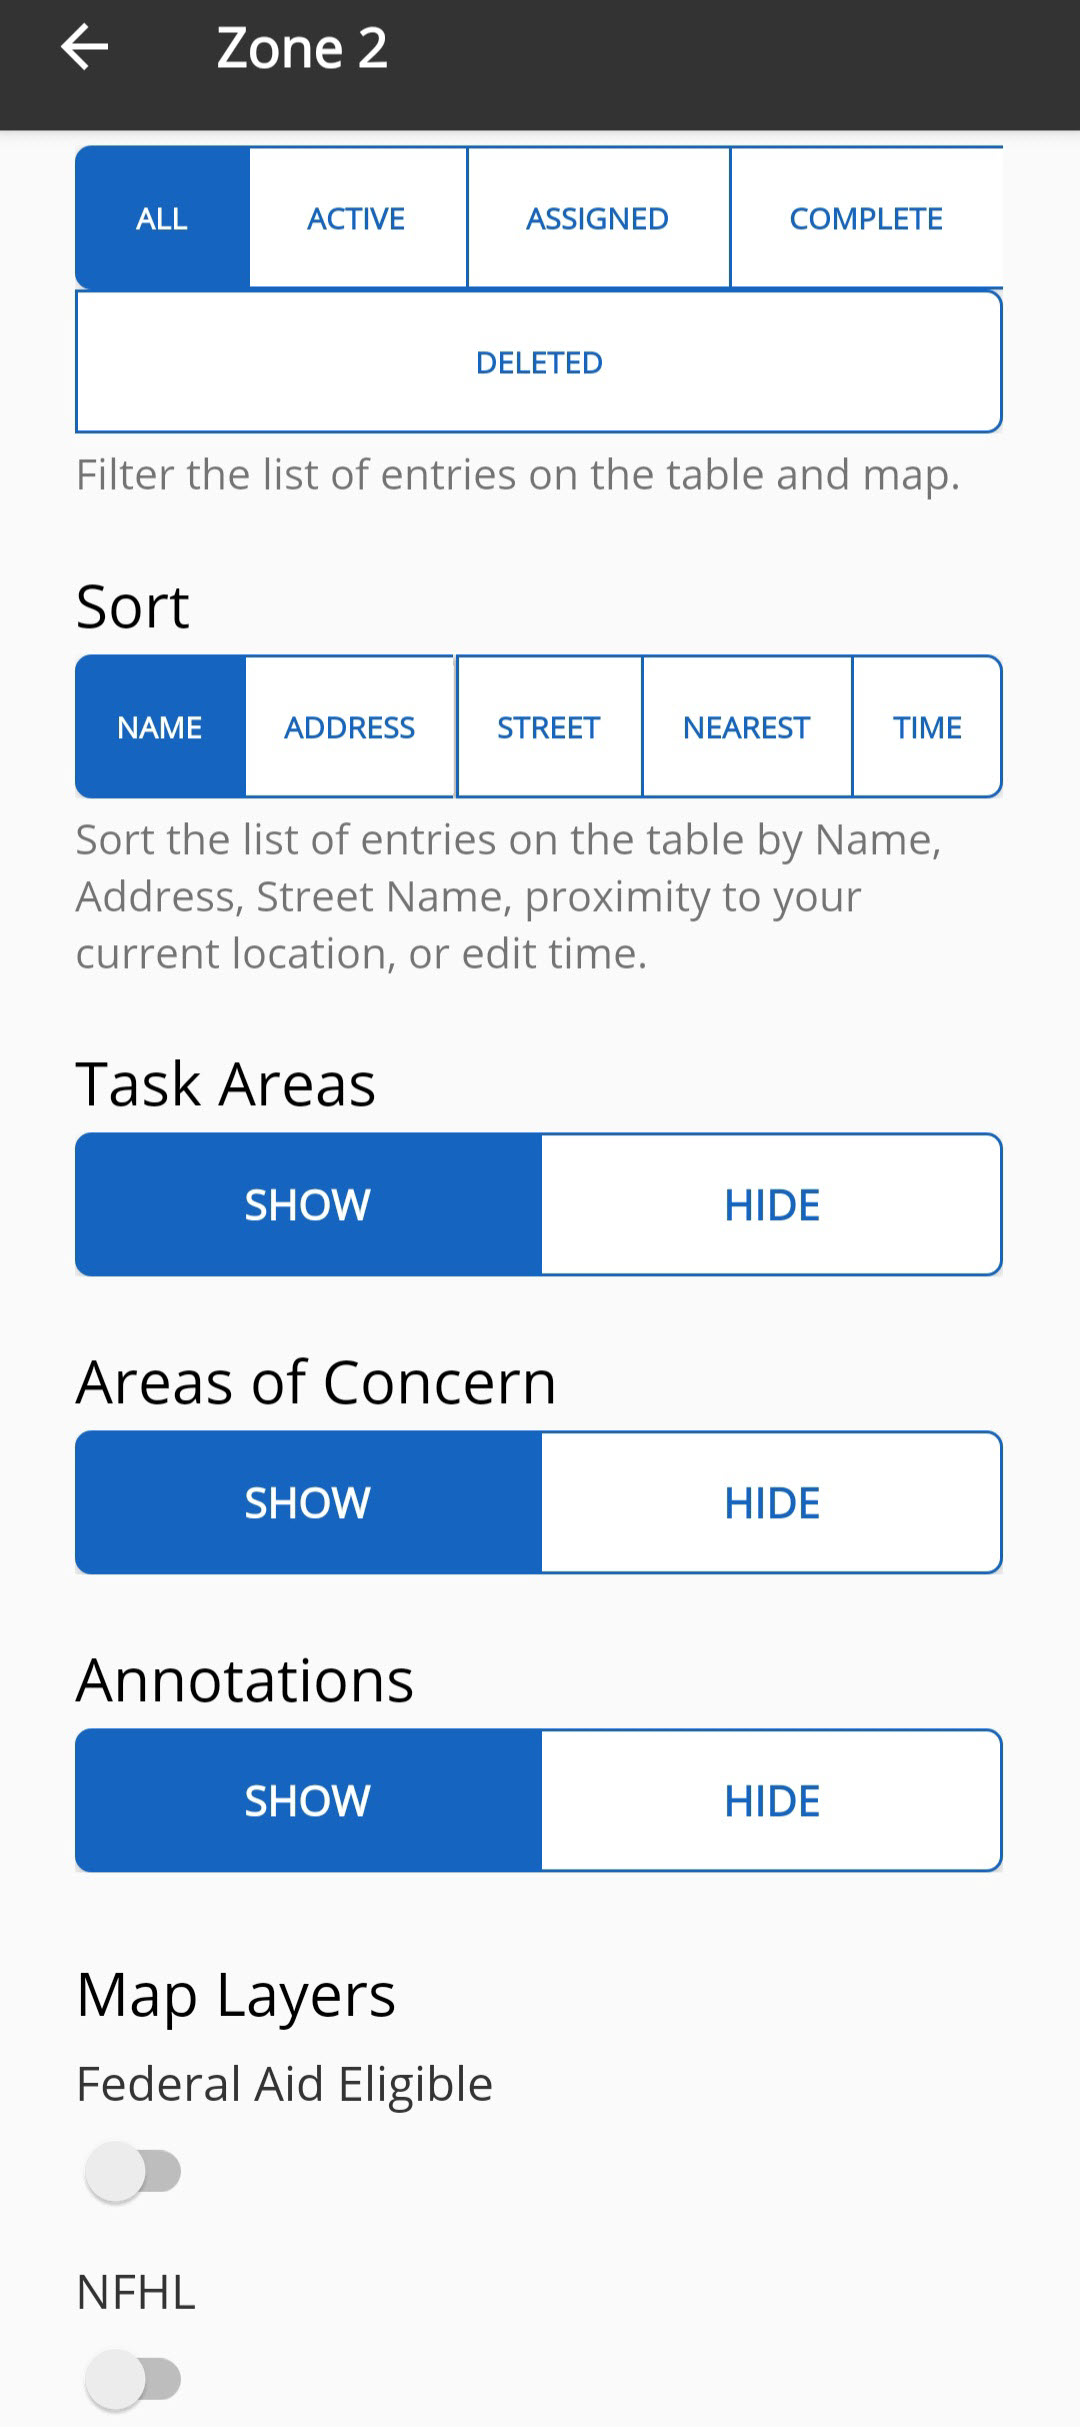
In our effort to improve the workflows for Substantial Damage Estimations, Esri Map Services, such as the NFIP Flood Hazards Layer (NFHL), have been enabled. Toggling this map overlay allows you to quickly see which structures are inside or outside of the flood zone.
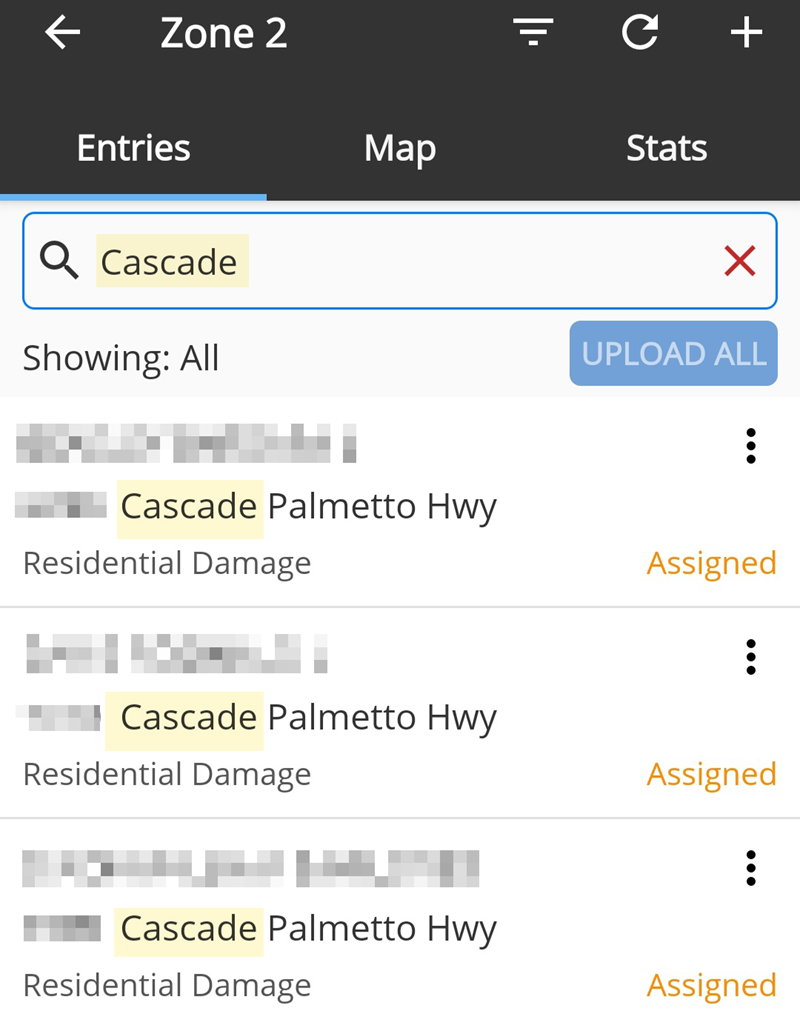
You can also use a search term in the Search field to filter the list.
You can also edit entries by copying them, moving them to a different task, or deleting them on the mobile application. To do this, tap the more options ![]() button and select the appropriate option from the menu.
button and select the appropriate option from the menu.
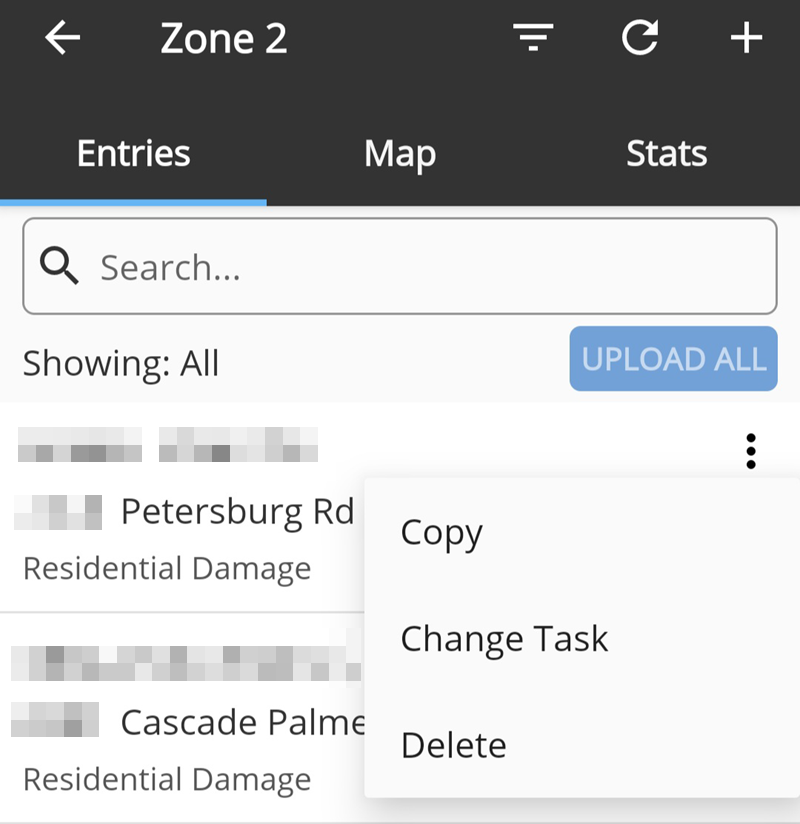
Example You may want to copy an entry, for instance, if you receive a Resident Self Report and want to turn it into a damage assessment. Selecting the Copy option allows you to select a damage assessment entry form and copy the Resident Self Report entry information into the damage assessment entry.
When trying to add an address location, either for a new entry or while editing an existing entry, you can search for an address or filter address locations by structure type.
Search for address
To search for an address, press the + button, then select a blank entry form. Press the Locate button and begin typing in an address in the Search field. Select the appropriate address from the list.
Filter by structure
To filter address locations by structure type, press the + button, then select a blank entry form. Press the Locate button, then select the structure from the search results of nearby structures.
The entry form you use affects the structure type available. For example, if you are working with a Residential Damage form, you are only shown residential structures.
If the Upload All button is enabled, that means one or more of your entries are saved to the device. Once you are in a location with reliable signal, tap Upload All to synchronize all of your changes for this task with the Crisis Track Desktop Console. Clicking any of the entries in the list will take you to that entry's details.