Add a Conditional Component
To add a conditional component
- In the Gallery, locate the board and click Design.
-
In the Input Views area, locate and click the input view. The view opens.
-
On the canvas, locate and click the component. The component is outlined.

-
On the upper right, click the gear icon. The component’s settings window opens.
-
Click the Conditional tab.
-
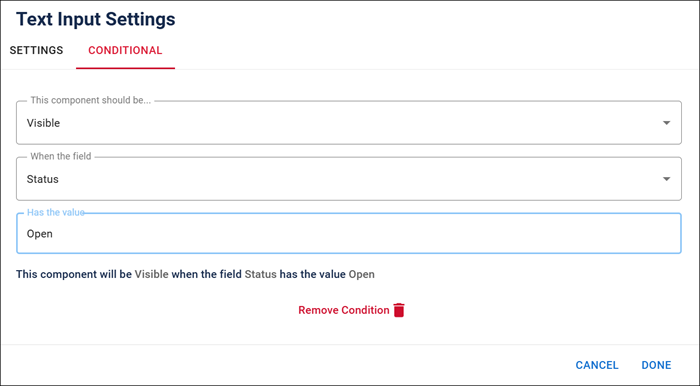
Complete the fields.
Conditional tab fields Field Description Procedure This component should be
Determines if the component appears or is hidden.
-
Visible
-
Hidden
When the field
Indicates the name of the field that will cause the condition to happen.
A field on the board.
Has the value
The value that, when entered in that field, triggers the state specified in the This component should be field.
A valid input value.
To determine the logic behind a conditional component, think of it as an if/then statement. For example, IF (the target component) has value X, THEN (This component should display = true) and the component is displayed or IF (the target component) has value X, THEN (This component should display = false) and the component is not displayed.

The value must be structured the same way as the target component’s values. For example, if your target component is a text input field, the value must match the field content exactly in terms of spelling, capitalization, and punctuation.
-
-
Click Done.
-
Above the canvas, click Save to save the board.