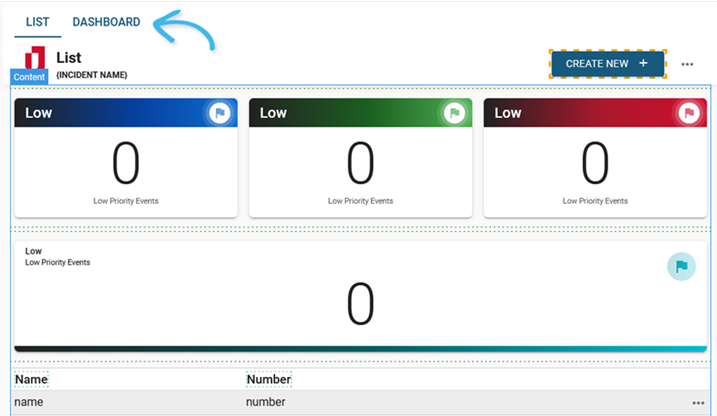
DesignStudio provides you with the ability to add tabs that allow you to switch between views. Each tab contains a view. These navigation tabs appear at the top of the board.
The Tab Group component is supported in the List view and the Dashboard View (DesignStudio Pro).

To add tabs
-
In the Board Gallery, locate the board for which you want to create view tabs, and then click Design.
-
On the upper right, in the Search for View list, locate and select a List view or Dashboard view.
-
On the Components Tray, under Toolbox, click Tab Group.
-
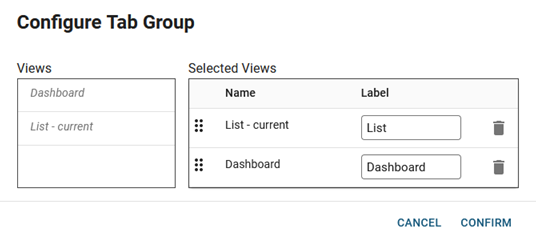
In the Configure Tab Group window, drag the WebEOC views that you want to appear in the tab from the Views list to the Selected Views list. Views that you drag to the Selected Views list become tabs.

The following settings are available.
Configure Tab Group fields Field Description Procedure Views
The views that have been configured for this board.
Drag the views that you want to appear as tabs to the Selected Views list.
Selected Views
The views that appear as tabs.
Do any of the following actions.
-
Click the Label field to modify the label that appears on the tab.
-
Drag
 up or down to change the order of the tabs.
 -
Click
 to remove a tab.
-
-
Click Confirm.
-
Click Save
 at the top of the canvas.
To modify tabs, click Tab Group to access the Configure Tab Group window.