After checking out, editing and saving a file, you should check it in make your edits available to others.
To check in a file
-
In the main menu, select Planning. The Planning Dashboard opens.
-
Click the Library tab. The Library page opens.
-
If necessary, in the Library for list, select your domain or facility.
-
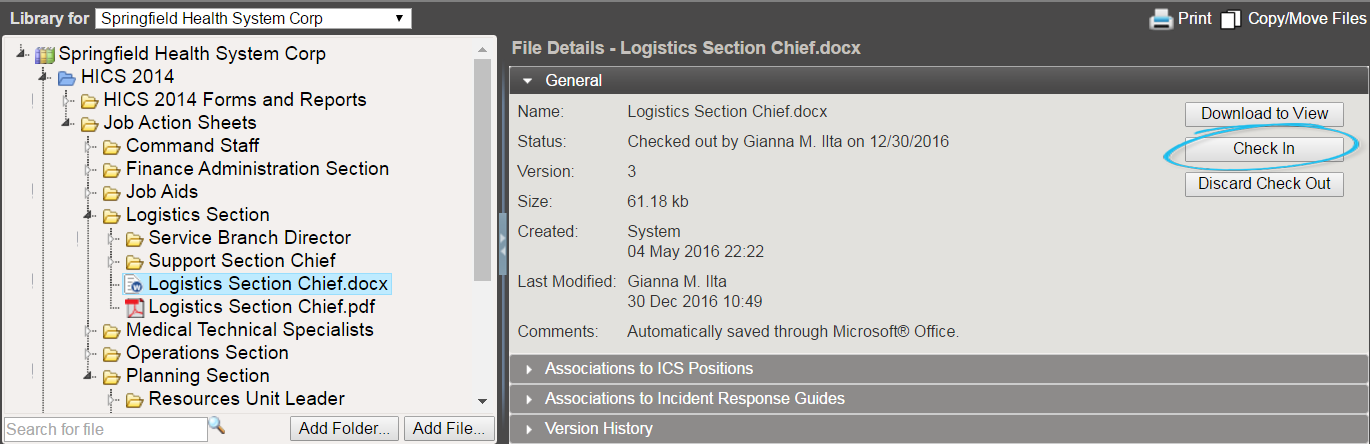
On the left, locate and click the file you checked out and edited.
-
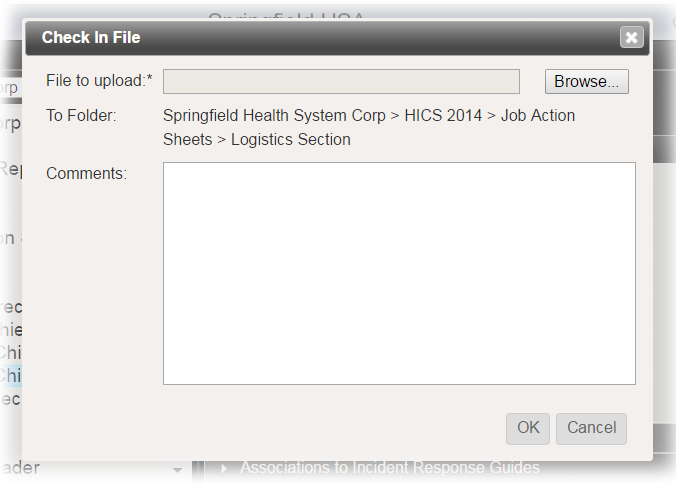
On the right, in the General drawer, click Check In. The Check In File window opens.
-
To the right of the File to upload field, click Browse. Your browser's file navigation window opens.
-
Navigate to locate and select the file you want to upload.
-
Click Open.
-
For Comments, enter notes or details about your edits.
-
Click OK. The file is checked in and your edited version is available to other users.
Related Concepts