Patient Disposition
In EMTrack, you can change a patient’s disposition or status to indicate when they are being transported, received, or discharged.
Disposition can be changed for a single patient or multiple patients at the same time. In EMTrack, there are several ways to access patient records Patient, client, or relative record containing information entered during intake., in order to change their disposition, and these ways are summarized below.
Access Records from a Dashboard
To access a single record from a client list gadget, locate the record in the gadget and click its view icon. The Detailed Patient Information window opens.
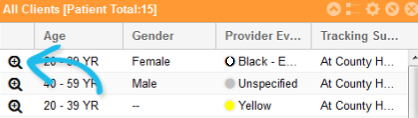
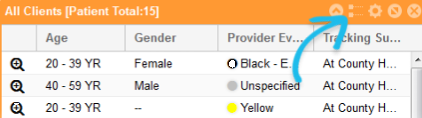
To access a list of patient records from a client list gadget, click the view patients icon in the gadget’s title bar. When the list opens, you can select the checkbox for each patient you want to manage.
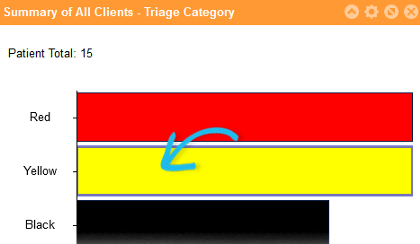
To access a list of patient records from a client summary gadget, click the appropriate area of the chart, graph, or table. For example, to view all clients in the yellow triage category, click the yellow bar in the chart (shown below) to open the list. For each patient you want to manage, simply select their associated checkbox.
To Access Records from Search Results
To search for one or more records, use the Filters tab. Specify your search criteria, then click Search. From the search results, select the checkbox for each patient you want to manage.
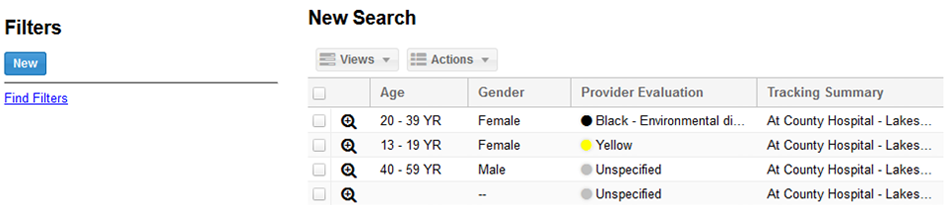
Alternatively, you can view a single patient’s record by clicking its view icon  in the first column. You may also be permitted to use the Locate tab to search for a patient.
Disposition Actions
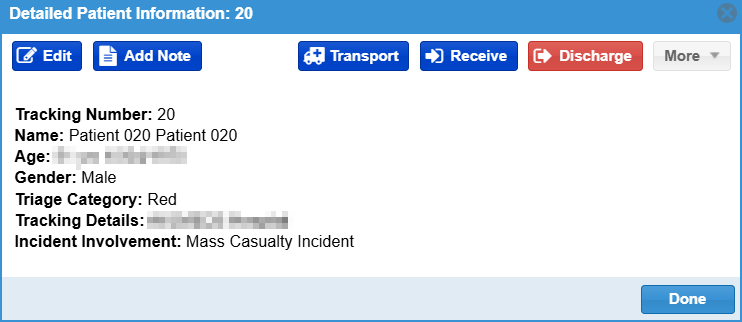
When you view a single patient’s detailed information, the disposition-related options are available at the top of the window.
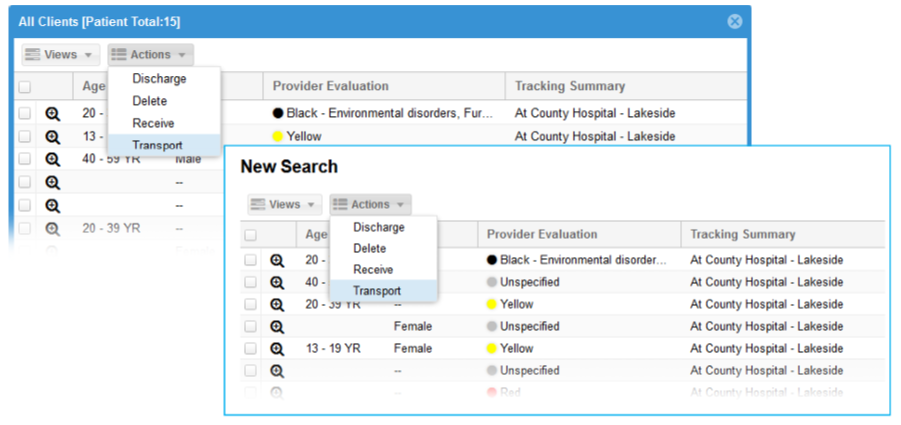
When you view a list of patients or the results of a search, the disposition-related options are available from the Actions menu.
Transporting
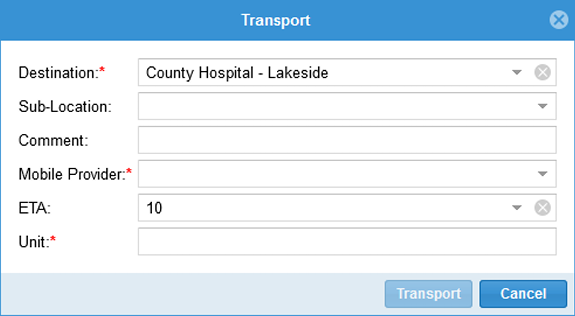
When transporting patients, you are required to specify the destination, mobile provider, and mobile provider unit.
You can transport multiple patients at one time as long as you can indicate the same destination, sub-location, mobile provider, mobile provider unit, and estimated time of arrival.
-
Access the patient record or the list of patients, as described in the access procedures.
-
If transporting a single patient, in the Detailed Patient Information window, click Transport.
-
If transporting multiple patients, in the patient list:
-
Select the check box for each patient.
-
Click Actions, and then Transport.
-
-
In the Transport window:
-
Select the appropriate Destination.
-
Select the Sub-Location, if appropriate.
-
Enter notes or comments into Comment, if appropriate.
-
Select the Mobile Provider.
-
Select or specify the estimated time of arrival in ETA, if appropriate.
-
Specify the mobile provider unit in Unit.
-
-
Click Transport.
Receiving
When receiving patients, you are required to specify the location. You can receive multiple patients at one time as long as you receive them to the same location and, when appropriate, sub-location.
-
Access the patient record or the list of patients, as described in the access procedures.
-
If receiving a single patient, in the Detailed Patient Information window, click Receive. Otherwise, continue with the following steps for multiple patients.
-
If receiving multiple patients, in the patient list, select the checkbox for each patient.
-
Click Actions, then Receive. The Receive window opens.
-
In the Receive window:
-
Select the Location.
-
Select the Sub-Location, if appropriate.
-
Enter notes or comments in the Comment field, if appropriate.
-
-
Click Receive.
Discharging
When discharging patients, you are required to specify the patient’s or patients’ disposition. You can discharge multiple patients at one time as long as you can indicate the same disposition (Discharge Choice) for each.
-
Access the patient record or the list of patients, as described in access procedures.
-
If discharging a single patient, in the Detailed Patient Information window, click Discharge. Otherwise, continue with the following steps for multiple patients.
-
If discharging multiple patients, in the patient list, select the checkbox for each patient.
-
Click Actions, then Discharge. The Discharge window opens.
-
In the Discharge window, for the Discharge Choice field, select the appropriate disposition.
-
Click Discharge.