Configure Category Fields
Categories allow you to assign an assortment of optional fields to your inventory without loading the inventory Input view with irrelevant fields that each category will not need.
To configure category fields
-
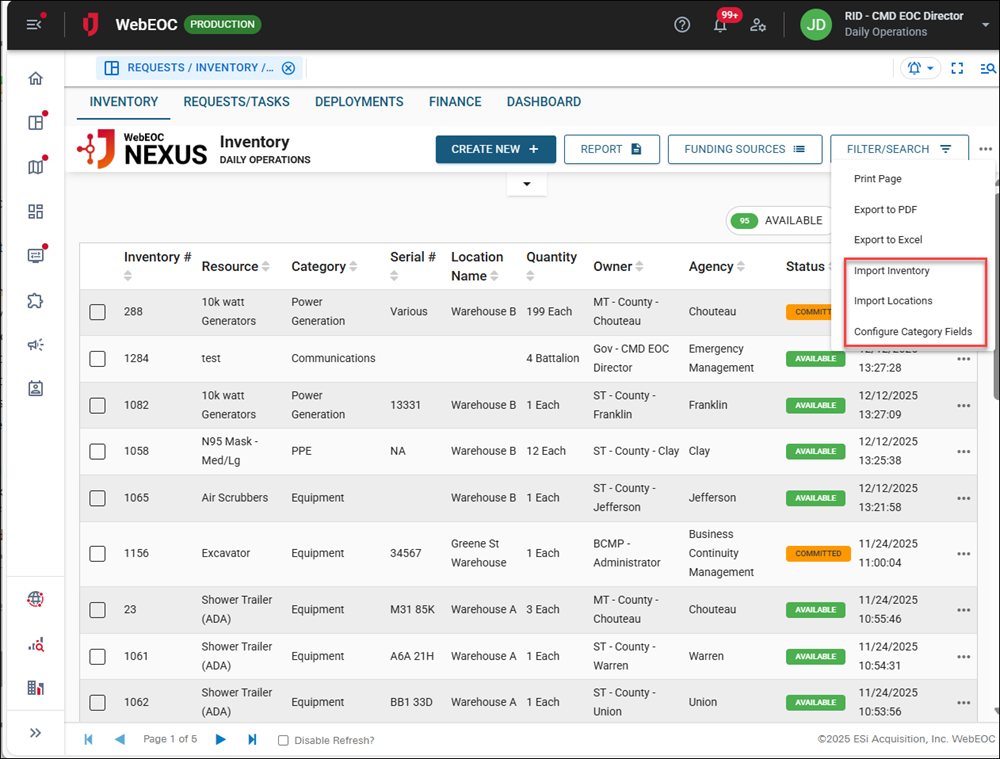
On the Inventory tab, click the ellipsis in the top right.
-
Select Configure Category Fields.
-
The Configure Category Fields page opens.
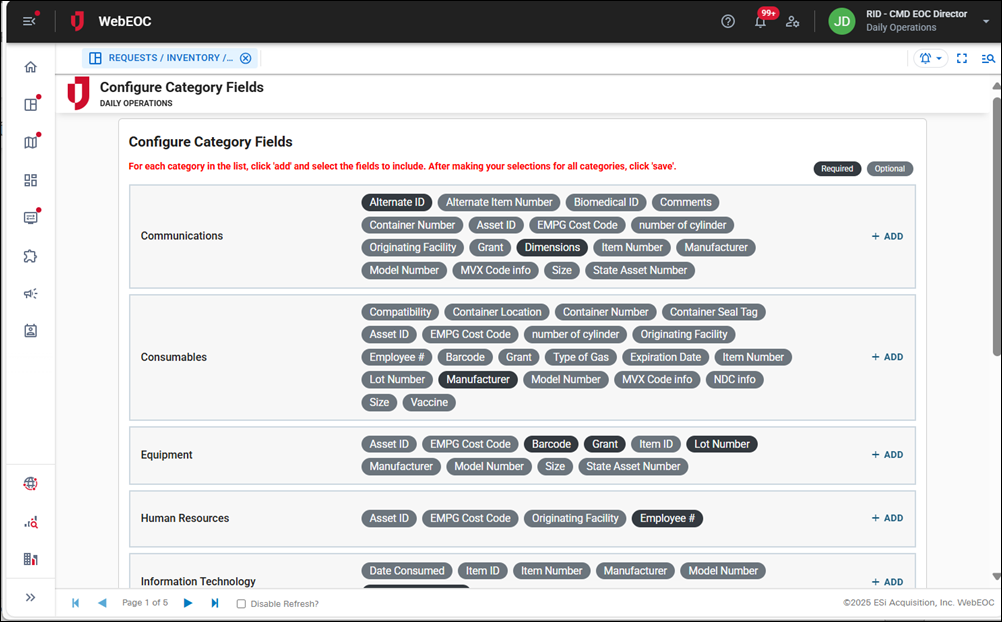
This page displays the default categories included on the board, such as Communications, Consumables, Equipment, and so on. Your administrator can configure the categories to suit your organization’s needs.
-
To assign the fields for each category in your inventory, click the Add button to the right of each category.
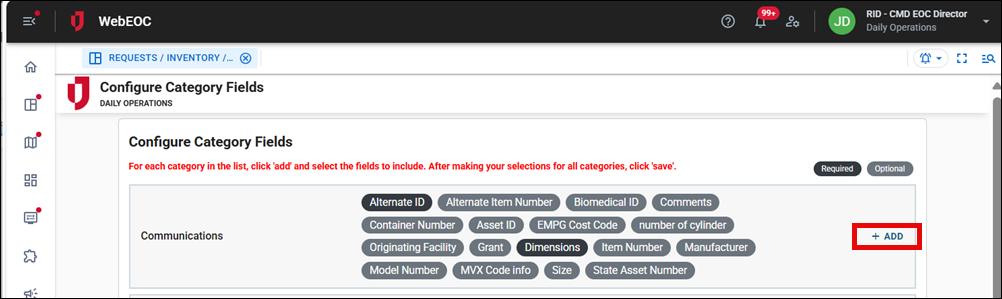
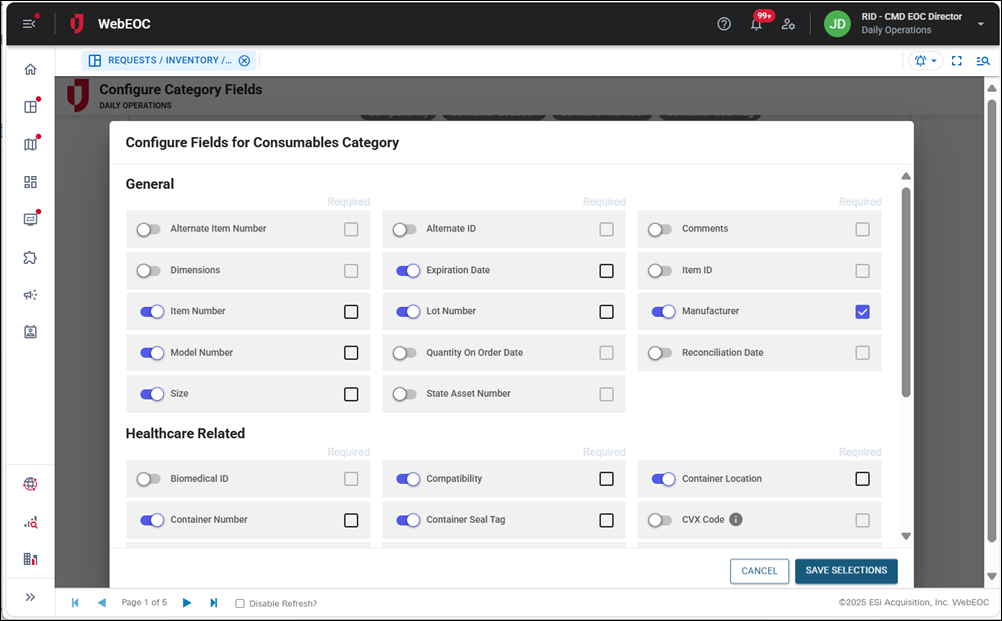
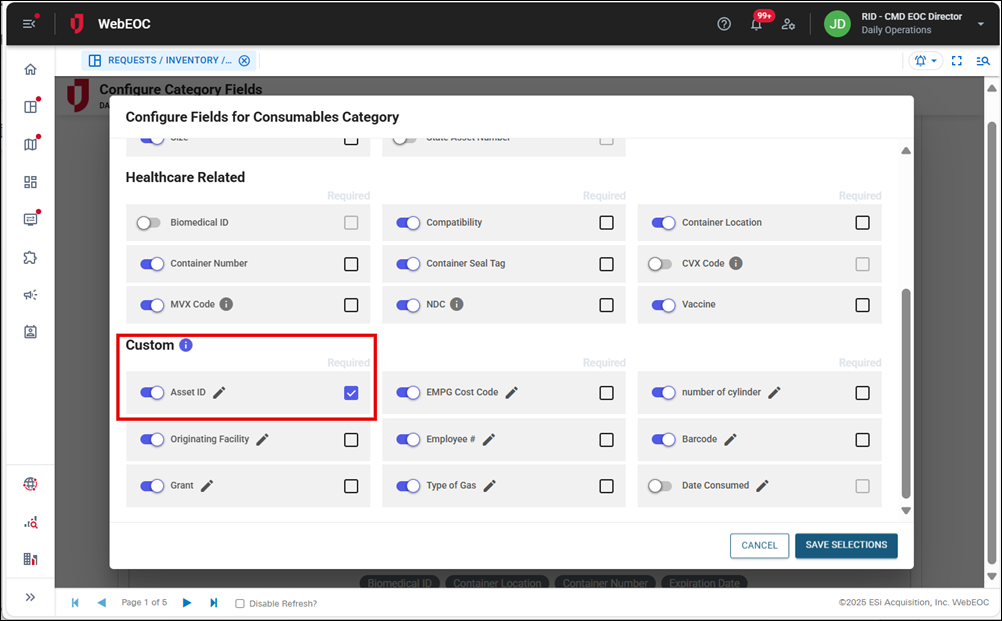
The Configure Fields for [Category Name] Category page opens.
-
Click the toggle next to each field to include it in the category.
-
Click the Required checkbox to make the field required when users are working with inventory records. For example, in the screenshot above, in the General category, the Manufacturer field has been set to required. The user must complete it when adding or editing an inventory record.
-
Scroll down on the page to access the Custom section. Here, you can rename custom fields to match your organization’s needs.
-
In the example above, the custom field Asset ID has been added and set as required.
-
After you have added all the fields in the categories, click Save Selections in the bottom right.
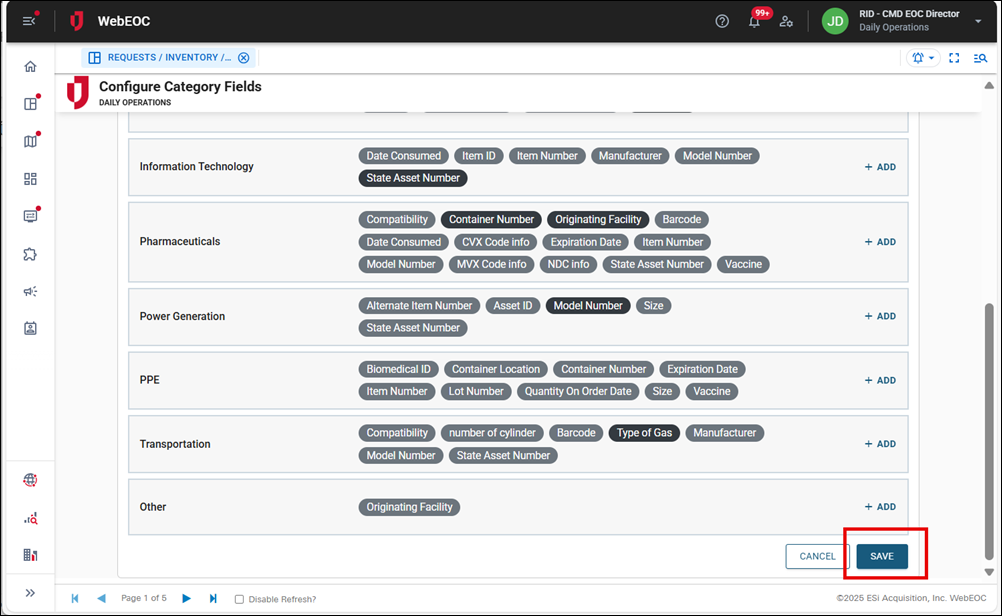
After you save your category fields, you are returned to the Configure Category Fields page.
Required fields display with a black background. Optional fields display with a gray background.
-
After all category field configurations are complete, scroll down to the bottom of the Configure Category Fields page and click Save in the bottom right.
After saving the category fields, you are returned to the Inventory tab.