Create Alerts by Location
Geoalerting is a powerful feature that streamlines alert creation by automatically identifying the recipients based on their geographic location. Rather than selecting contacts manually, you simply draw an area on the map and the system finds all matching contacts within it. This ensures the right people are notified instantly, whether you're coordinating a response to a natural disaster, a public safety incident, or an operational emergency.
Required Information for Geoalerts
Important: For recipients to be selected for geoalerts, the following information must be stored:
-
Address Line 1 + City + State or
-
Address Line 1 + Postal Code
If these recipients are contacts, an administrator must complete these fields in their contact details, or the user must be members of an organization that has these fields completed in the organization profile. See Create a Contact Account and Add an Organization for details.
If these recipients are WebEOC Nexus users, they must complete this information in their contacts details page, on the Personal Information tab. See Manage Contacts for details.
You can access this feature when you are:
-
Creating an alert or an alert template when adding internal recipients to the alert on the Add Recipients page on the Location tab.
-
Configuring board notifications as an administrator.
To set up geoalerting when sending alerts on the Add Recipients page or when configuring board notifications
-
Access the Add Recipients page while creating an alert or an alert template. Access the Recipients page when configuring board notifications.
-
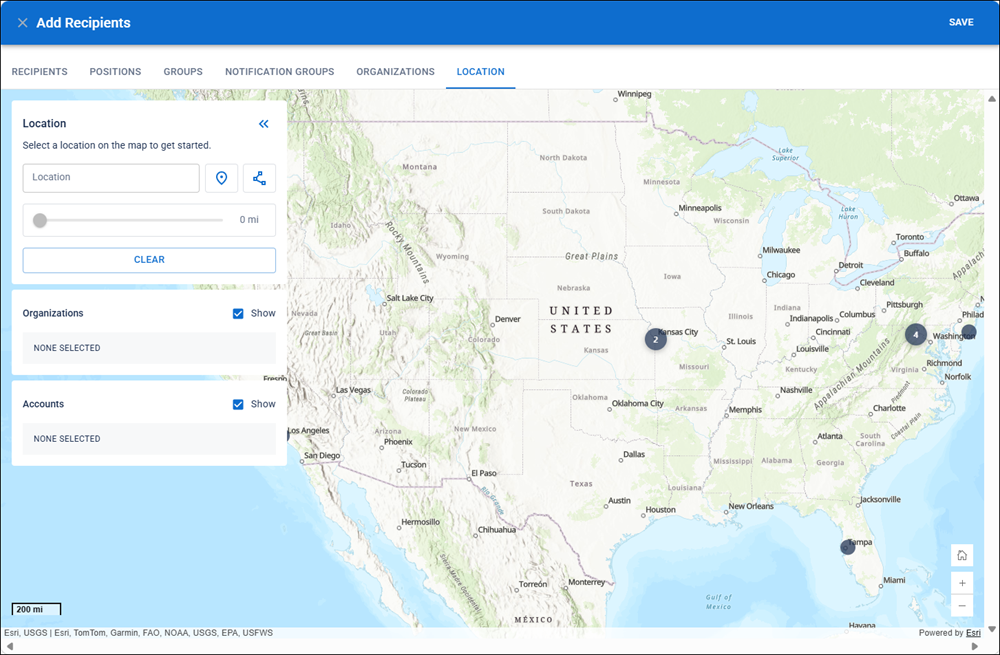
Click the Location tab.
-
To set a location on the map to send recipients in that location this alert either:
-
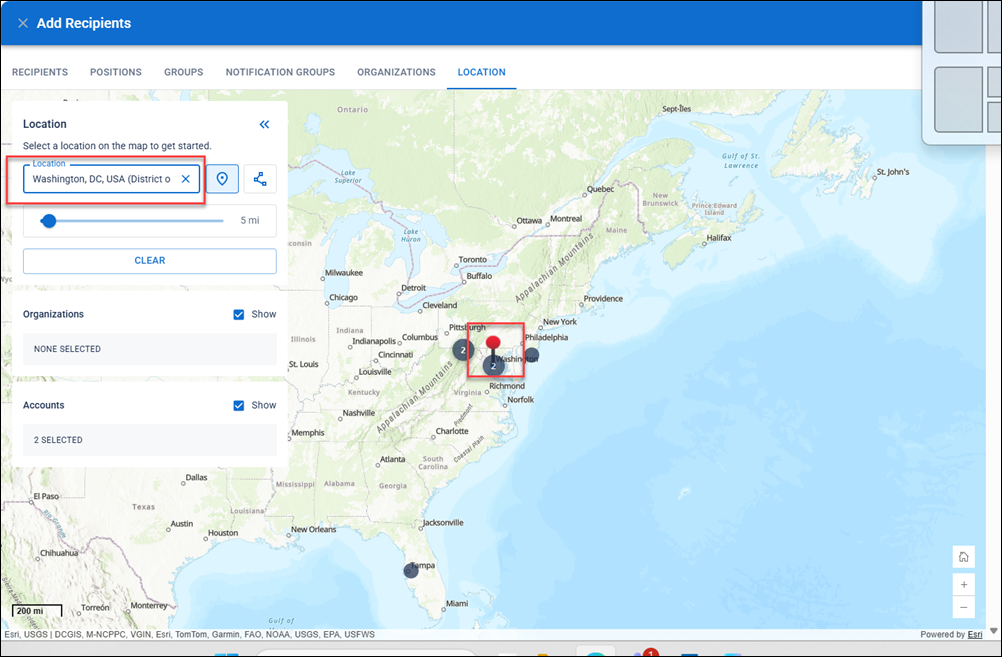
In the Location field, enter a location, either by entering the physical address or entering latitude and longitude, and press Enter to drop a pin on the map. You can also select the location address as it displays in the drop-down menu.
-
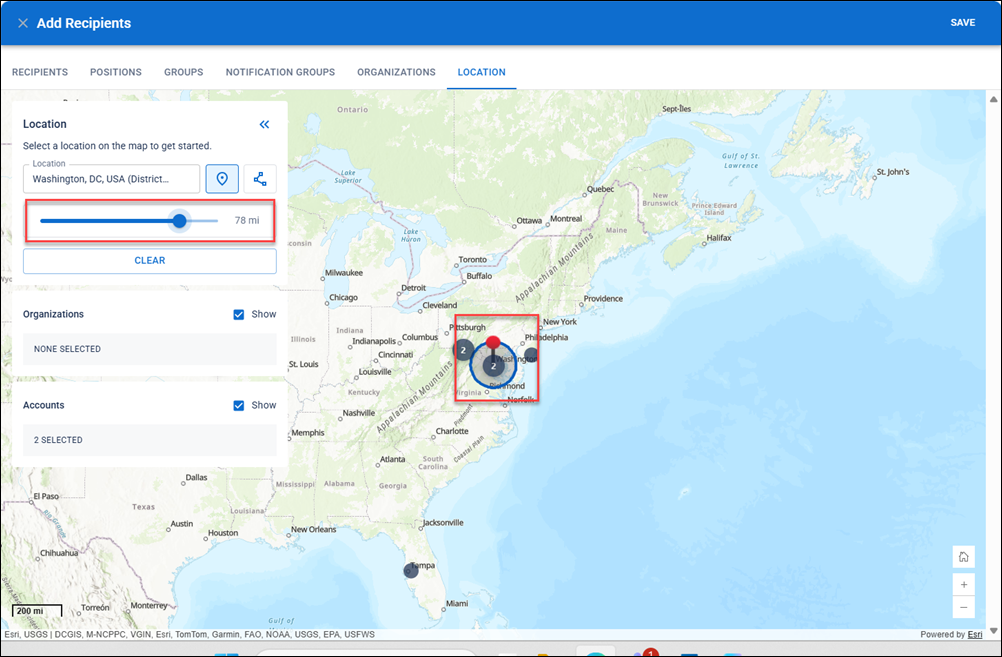
Expand the radius of the area on the pin by dragging the slider. You can create a radius around the location of up to 100 miles.
-
To select a range using a polygon shape, click the polygon icon, and click the map to draw the shape. Click once to create a segment and click twice to close the shape.
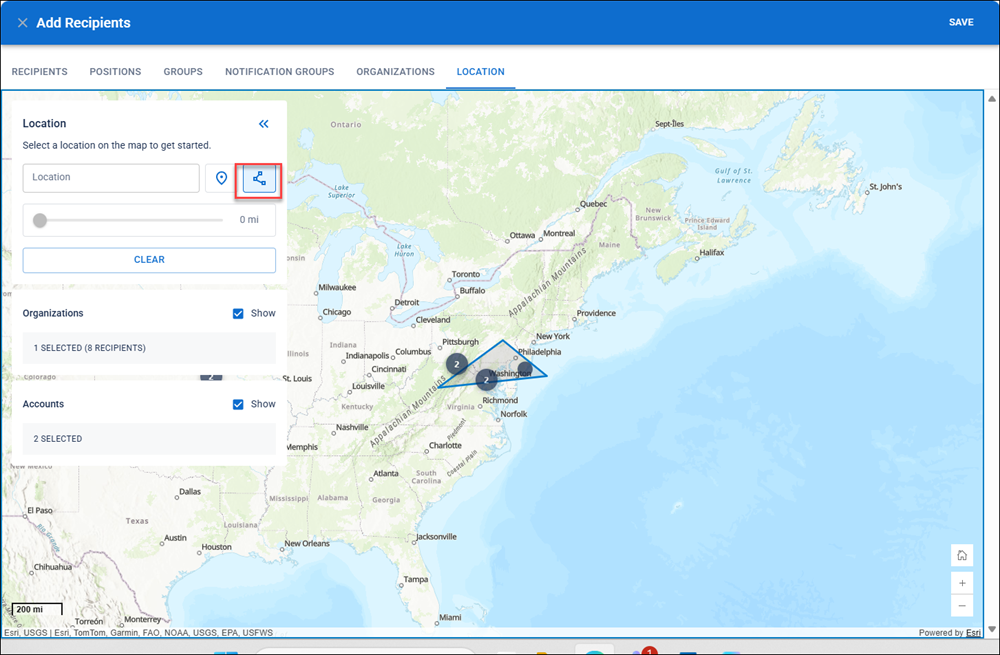
As you expand the selection, under Organizations and Accounts, the number of recipients updates. You can select up to 500 recipients using this method.
-
-
Click Save in the top right.
The selected recipients display in the Total Recipients section on the Select Recipients step of the Create Notification wizard.