Copy Entries for a Task
In the Tasks module, you can add new entries by copying existing entries. While copying entries, you can change the form, status, or task for all copied entries or leave them unchanged. Admins can also copy the entries to a different incident.
For example, if you want to collect multiple types of data for one location, you could copy an entry for that location multiple times and select a different form for each copy.
If you want to copy entries but not for a specific task, instead see Copy Entries.
-
Locate the task for which you want to copy entries. On that row, click View. The task opens.
-
Do one of the following, depending on how many entries you want to copy.
-
Copy one entry: On the table, locate the entry you want to copy. On that row, click Copy. The Copy Entries window opens.
-
Copy multiple entries: On the table, select the checkbox for each entry you want to copy. On the upper right, click Edit and select Copy. The Copy Entries window opens.

-
-
Select a form and status for the copied entries.
-
If you want to copy the entries to another incident, select Copy to another incident, then select the incident.
You must be an admin to copy entries to another incident.
-
Select a task to assign all the copied entries to.
-
Click Save.
-
Locate the task for which you want to copy entries. On that row, click View. The task opens.
-
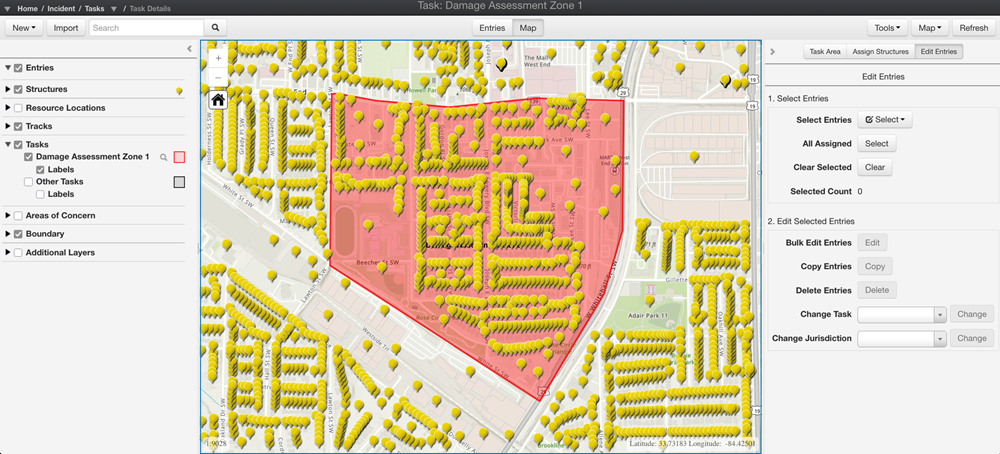
On the action bar, click Map. The Map page opens.
-
On the right pane, click Edit Entries.
-
Do one of the following, depending on whether you want to copy all assigned entries or only specific entries.
-
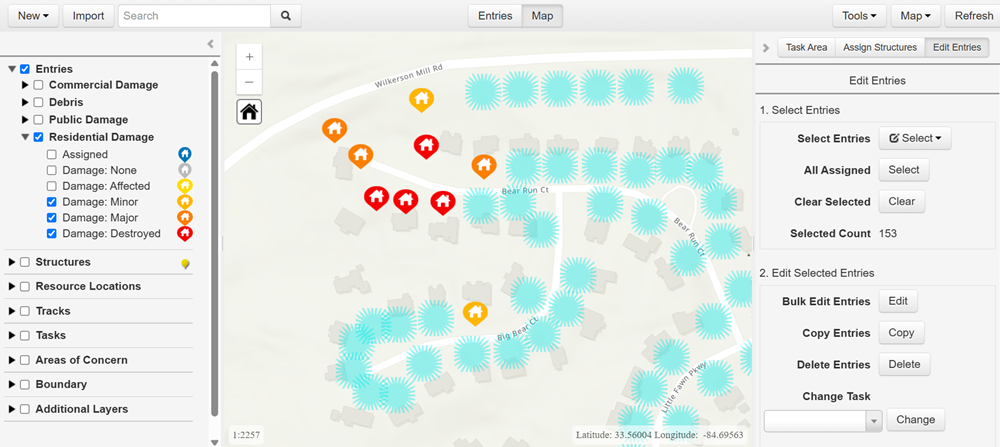
Copy all entries within the task area: Click Select next to the All Assigned label. This highlights all the assigned entries (as shown in blue in the image below).
-
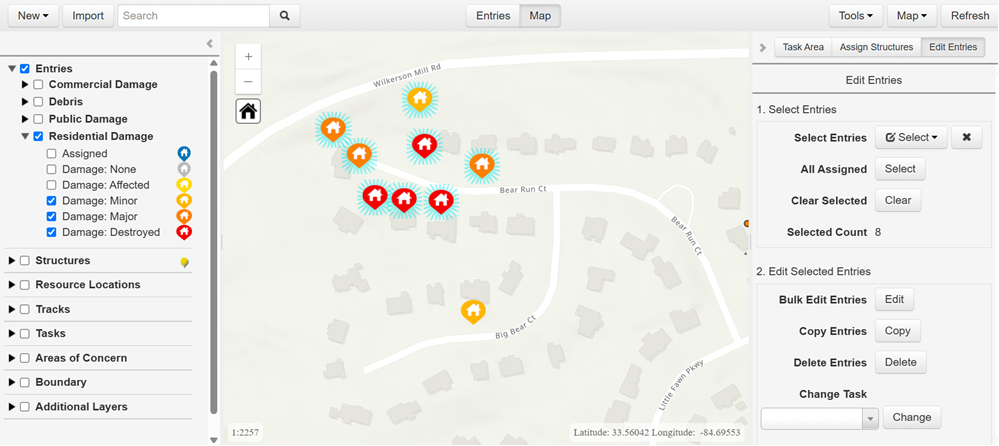
Copy specific entries within the task area: Choose a Select Entries method (Rectangle, Polygon, or Freehand Polygon) then draw an area around specific entries. This highlights all the selected entries (as shown in blue in the image below).
-
-
Click Copy. The Copy Entries window opens.
-
Select a form and status for the copied entries.
-
If you want to copy the entries to another incident, select Copy to another incident, then select the incident.
You must be an admin to copy entries to another incident.
-
Select a task to assign all the copied entries to.
-
Click Save.
Related Concepts