Collect Maintenance Records
As part of a Public Assistance grant application, FEMA requires pre-disaster maintenance records for infrastructure repair projects. Crisis Track can be used to collect maintenance records on infrastructure such as roads, bridges and culverts, which can be used as essential elements of information in a Public Assistance grant. Here's the detailed workflow for pre-planning infrastructure inspections before an incident.
Preloading the inventories of culverts and bridges will allow you to more quickly ensure completeness of plan maintenance tasks. In fact, many public works teams already have this infrastructure inventoried.
Juvare data analysts will work with your public works crews to organize and load the data into Crisis Track. It's included in the subscription service that was quoted. Please contact support@juvare.com for assistance.
If the inventories do not already exist, you can use Crisis Track to capture the inventories for you. Here's how to capture infrastructure from the web console in the office:
-
After logging in, click into the Administrative Functions section and click the Structures module. This is the infrastructure table for all incidents.
-
Click New and zoom the map to where you want the structure located. (You can also search by an address.)
-
Click the Hand icon
 and click on a point on the map.
 -
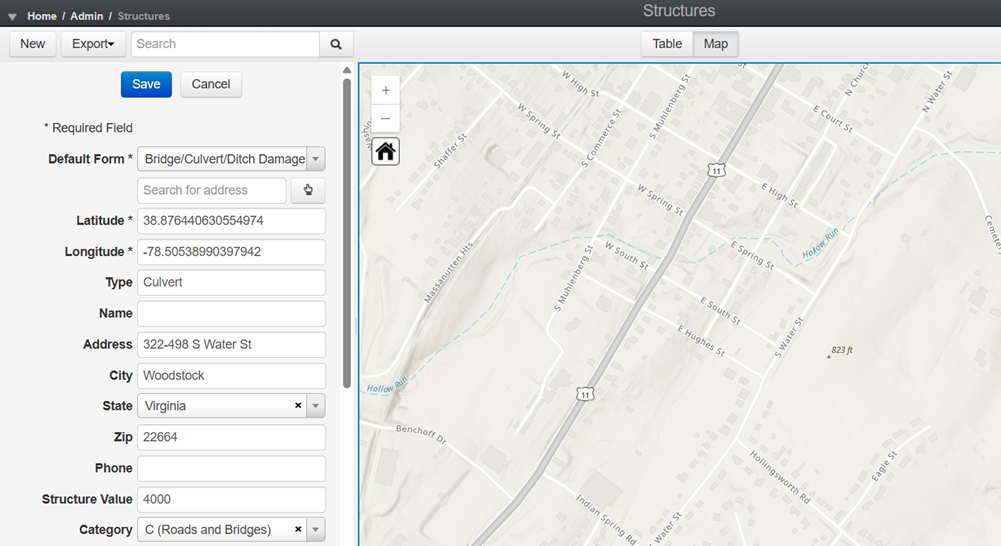
Complete the form in the left panel.
-
Default form: the entry form type that the system will use when this structure is selected. For culverts or bridges, use Bridge/Culvert/Ditch Damage.
-
The address will be auto-populated based on the location of the point you clicked, as will the Latitude and Longitude.
-
Type: the type of structure, for example, "Culvert".
-
Structure Value: the replacement value of the infrastructure.
-
Category: the grant eligibility category of the infrastructure. For instance, a culvert will be Cat C Roads and Bridges.
-
Everything else will either be pre-populated or optional.
-
-
Click Save.
You can also capture infrastructure points using the Crisis Track mobile app by using the infrastructure form (see Collecting data from a mobile app). This will use the GPS of the device to locate the structure as well as give the field person the option to select a point on the map.
With the infrastructure inventory loaded ahead of time, you now have a map of infrastructure you can use to assign inspection/maintenance tasks. Here's how you can create a Public Works team and Bridge/Culvert Inspection task:
-
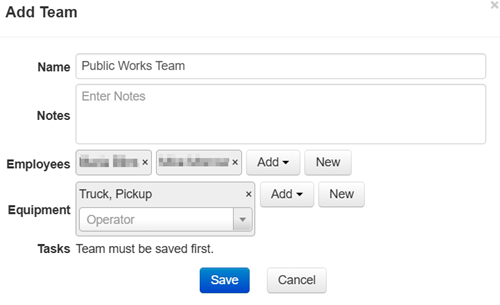
Create a Public Works Team. A team is a collection of personnel and equipment used to keep track of time. A team is assigned one or more tasks. To create a team:
-
Open an existing incident or create a new incident and click in the Teams module.
-
Click Add and select New Team from the menu. You can also set up Preconfigured Teams that are used multiple times to select from the menu.
-
Type a Team name and select Employees and Equipment from the list. You can also indicate the Operator of any equipment for FEMA reimbursement purposes.
These lists come from employee and equipment inventories you can load ahead of time.
-
Click Save.
-
-
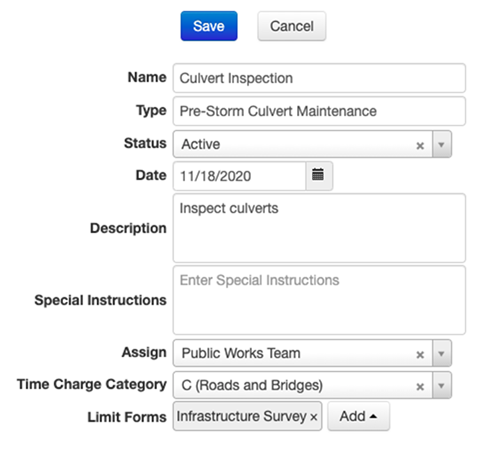
Create an Inspection/Maintenance Task.
A Task is a collection of entry forms that are assigned to a team. Tasks can be organized by area and/or by type.
To create a task:
-
Click the Task module in the incident homepage.
-
Click Add then select New Task from the menu. Like Teams, you can set up and select Preconfigured Tasks that are regularly used.
-
Type a Task Name and type, then select a status and date.
-
Enter a description and/or special instructions if you want, then assign the Task to the Team you created in Step 1.
-
Select C (Roads and Bridges) as the time charge category. These will show up on the mobile application as well as an ICS 204 document output. If you want to limit forms, select a form from the list.
-
Click Save.
-
-
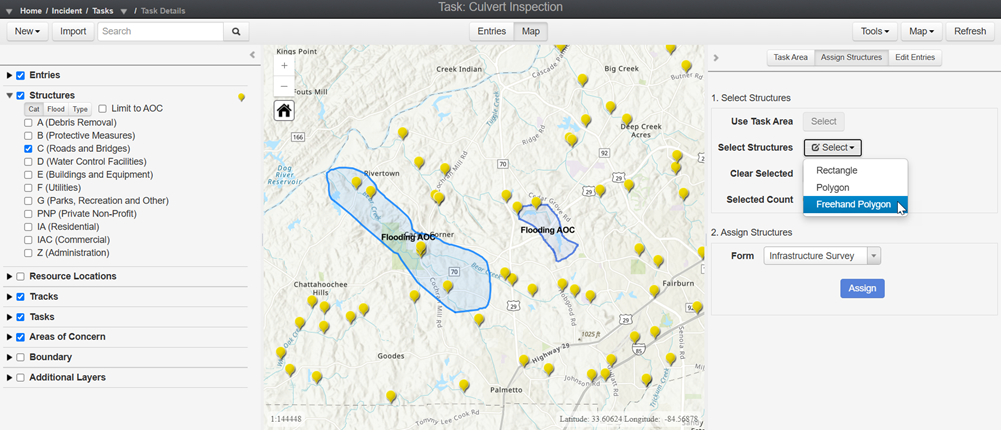
Now you will see a map where you can draw an area where you want the team to operate in or select a group of structures you want the team to inspect. For the example, we selected the culverts by clicking the Assign Structures tab, enabling only the C (Roads and Bridges) structures in the legend, and selecting the structures by drawing a freehand polygon around the yellow points.
-
Change the form type from Damage Assessment to Infrastructure Survey then click Assign. This will create pre-populated Infrastructure Survey forms for your field teams to complete.
-
Now your field teams can use the mobile app to have a complete list of all the culverts to inspect.
The Infrastructure Survey form was developed by several of Juvare's clients. We can modify or change this form to meet your specific needs at no additional cost. Please contact support@juvare.com for more assistance.
-
Download and log into the Crisis Track mobile app using the same credentials Juvare provided you earlier. You can find the app on the Google Play store, Apple App store, Windows store, or the Amazon Kindle App store.
-
Select your incident and click Collect Data.
-
Select the Team and the Task you created earlier.
-
Click Start. The unit is now tracking the time and the location of the device.
-
You will see a list of bridges/culverts to inspect. If you click on the Map button, you will also see the locations to visit on the map.

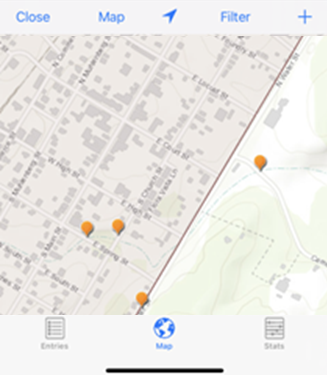
-
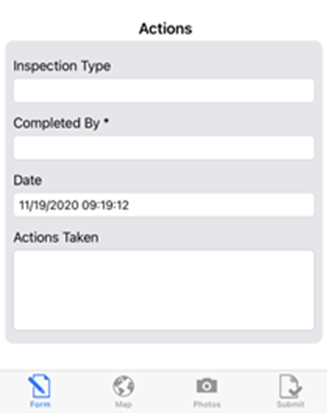
Clicking on a dot or an entry will return a pre-populated form for the field team to complete.

-
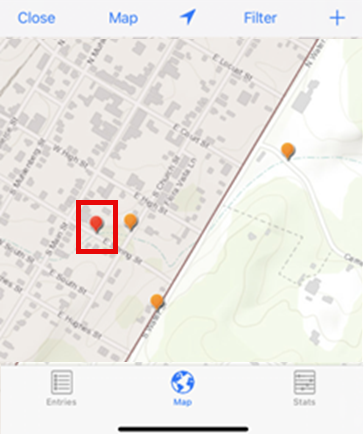
If the bridge or culvert is not currently in the structures inventory, you can add a blank inspection form by clicking the plus button
 in the upper right corner. This form will use the device's GPS as the location of the bridge or culvert.
 If you would like these locations to be permanently added to your infrastructure inventory, please contact support@juvare.com for assistance.
-
Clicking the Photos button
 will allow the field team to take multiple pictures of the inspection or maintenance performed.
 -
Lastly, click Submit and Save/Upload to upload the assessment. Notice the dot on the map changes color now that it's complete. If you do not have internet connectivity, the entry will automatically save to the device.
Once the field work is complete, you can view and report on the outcomes and time taken during the operation.
-
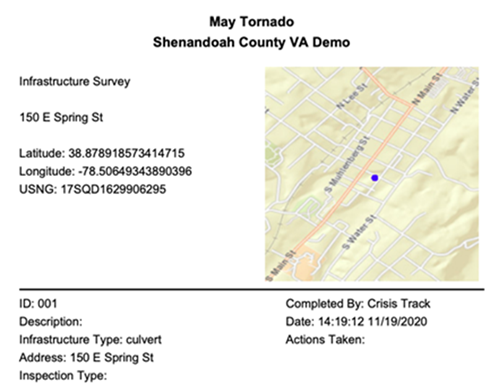
In the Incident Home Screen on the web console, click the Entries module and click Export.

-
Limit the forms to Infrastructure Survey, then click PDF. This will create a one-page pdf export of the maintenance operations you just performed. These PDFs can be uploaded directly to the PA Grants Portal as an essential element of information for a PA project.
-
You can see the time the team has spent by clicking the Employee Records module. If the Task was assigned a PA work category, this time will auto-populate a FEMA Project Worksheet or an FEMA 90-123/125.
-
Click the Documents module, then click Add and select FEMA 90-123 from the menu.
-
Click Add Records then Add for all employees in the Add Records window. You can see the time records fill out the paperwork.

-
-
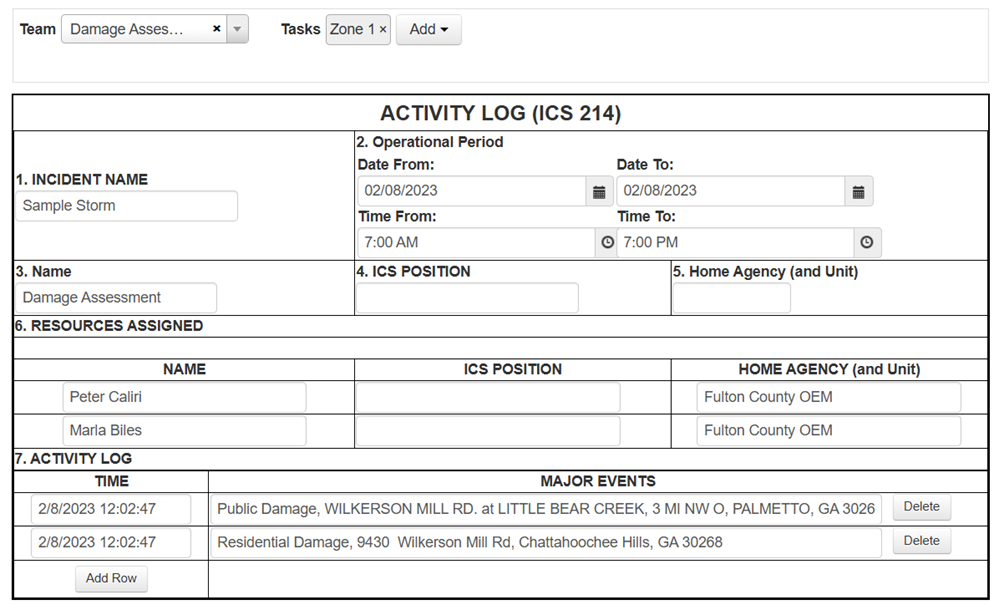
For a unit log, click View for the ICS 214. Select your Team and Inspection Task. This will auto-populate a unit log with a timestamped major event for every entry form that the team captured in the field.
All of these outputs can be used to better document your activities for FEMA Public Assistance Grant projects. If you have any questions or would like us to review this in more detail, feel free to reach out at support@juvare.com.