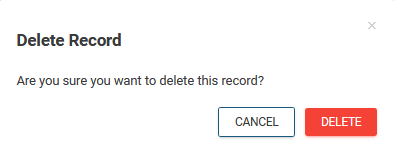
When you design a board, you can add a delete confirmation message called a Delete view that appears on your board in WebEOC when a user attempts to delete a record. These messages help to prevent the accidental deletion of records. A default message is provided; however, you can configure the message header and message body. You can also add dynamic tags to the message body, containing information about the record in relation to the incident, or any other related field.
After you create a Delete view, you assign it to the Display view associated with the board in which you want it to appear. See Assign a Delete view to a List view.
The board must have an Input view and a List view before you can create a Delete view.
To add a delete confirmation message
-
In the Board Gallery, locate the board, and click Design.
-
On the upper right, click Create > Delete View.
-
In the Delete View window, enter the following information, and then click Create.
-
For View Name: Enter a name for the view.
-
For Associated Input View: Select the Input view that is associated with the board.
-
-
Click Create. A preview of the default message displays.

-
To edit the message, click the window, and then on the upper right, click the gear icon.
-
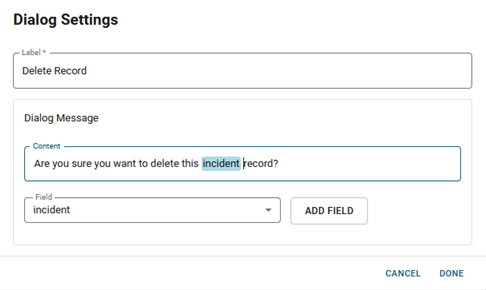
In the Dialog Settings window, accept or modify the contents of the window that appears when a user attempts to delete a record.
-
For Label: Accept or modify the name that appears as the title in the window.
-
For Content: Accept or modify the message that appears.
-
-
To add a dynamic placeholder for other data about the record in the message, perform the following actions.
-
Locate the place in the Content field where you want to insert the data and click there to position the cursor.
-
In the Field list, select the name of the field you want to insert.
-
Click Add Field. The placeholder appears in the message. The information associated with that field for the record being deleted appears in the message.

You can add multiple placeholders.
-
Click Done. The window closes.
-
Above the canvas, click Save
 .
.