During an incident or while planning, you can activate or deactivate a position in the ICS chart. Positions must be activated for contacts to be assigned, and when you activate a position, you have the option to notify contacts in the position's depth chart.
To activate an ICS position
-
Navigate to either the Planning Dashboard or the Incident Dashboard. Then, do one of the following:
-
Planning Dashboard: In the Plan Summary tab, select the correct domain or facility and plan.
-
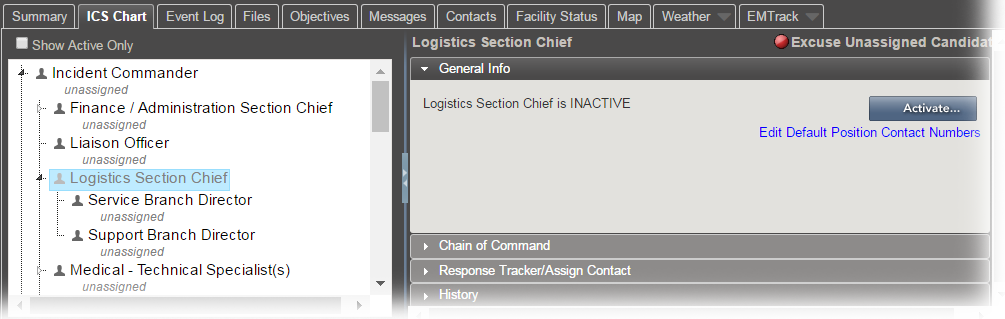
Incident Dashboard: Select the ICS Chart tab.
-
-
On the left, click an inactive position (inactive positions appear light gray). Position details open on the right.
-
On the General Info or Chain of Command tab, click Activate. The Activate Position window opens and displays associated contacts.
-
Select the checkbox for the contacts you want to notify. If there are no associated contacts, you can assign contacts.
-
Click OK. The position appears active in the ICS Chart.
To deactivate an ICS position
-
On the Incident Dashboard, click the ICS Chart tab. The ICS Chart page opens.
-
On the left, click an active position (active positions appear dark gray). Position details open on the right.
-
On the General Info tab, click Deactivate. The Deactivate Position window opens.
-
Click Yes. The position appears inactive in the ICS Chart.
Related Concepts