On the Summary tab of the Incident Dashboard, using the Manage Ops Periods option on the Incident Dashboard, you can add, edit, prioritize, and delete custom operational periods A defined time frame for executing incident objectives and assignments..
Changes to custom operational periods only affect incidents created thereafter, not existing incidents.
To access custom operational periods
-
On the main menu, select any active incidents. The Incidents Dashboard page opens.
-
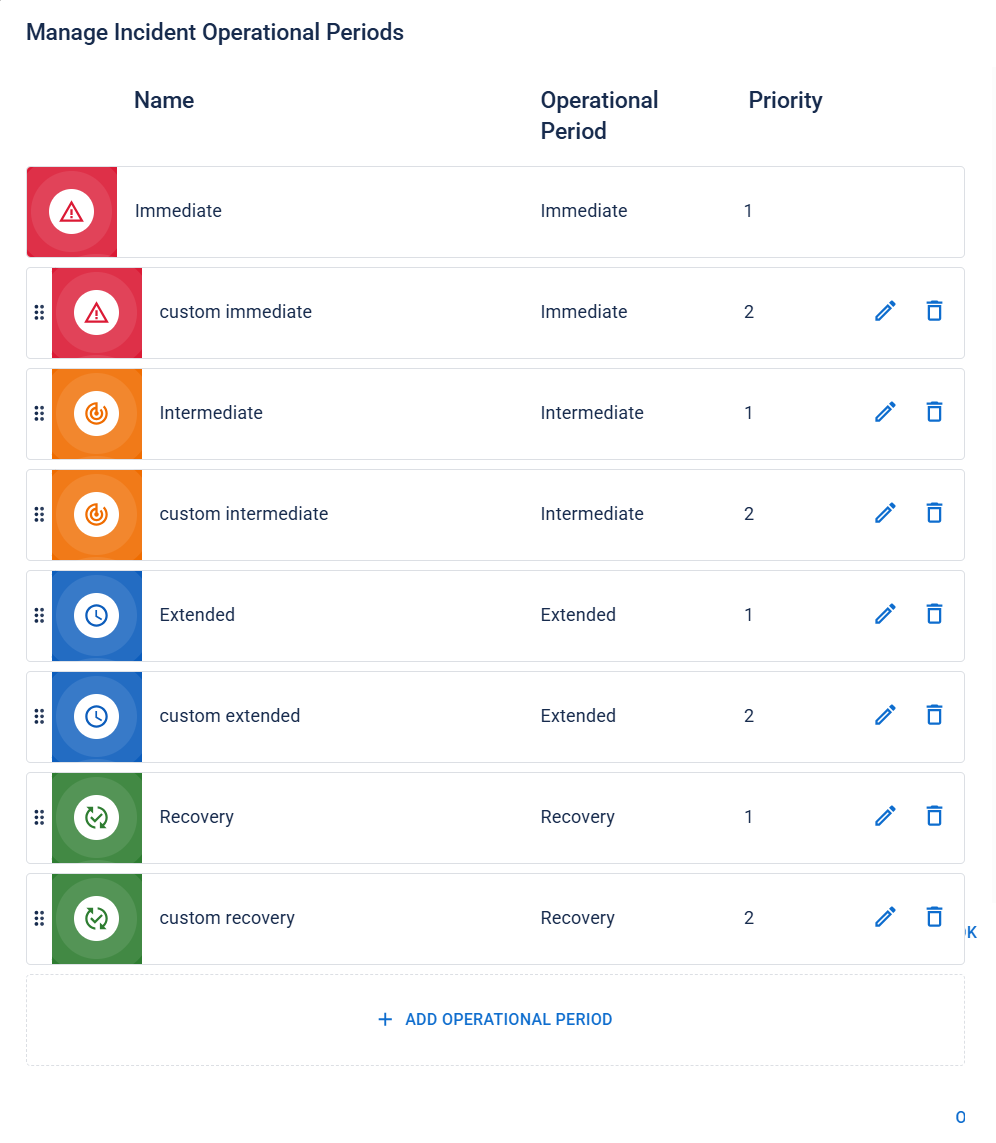
Click Manage OPS Periods on the Summary tab. The Manage Incident Operational Periods window opens.
To add a custom operational period
-
On the Manage Incident Operational Periods page, click Add Operational Period. The Add Operational Period window opens.
-
Enter a name for the custom operational period.
-
For Operational Period, choose the corresponding default operational period. This helps determine the order of custom operational periods and the timing for objectives to become visible.
-
Click Submit.
To prioritize custom operational periods
When multiple custom operational periods are assigned to the same default operational period, you can prioritize the custom periods to place them in chronological order. Incidents can only move forward through operational periods chronologically, so it is important to set the order correctly.
On the Manage Incident Operational Periods window , click the tile you want to prioritize and drag it above or below other tiles for that default operational period.
To edit a custom operational period
-
On the Manage Incident Operational Periods page, locate the operational period you want to edit. On that row, click the edit icon
 . The Edit Operational Period window opens.
 -
Edit the name or default operational period as needed.
-
Click Submit.
To delete a custom operational period
-
On the Manage Incident Operational Periods page, locate the operational period you want to delete. On that row, click the delete icon
 . A confirmation dialog opens.
 -
Click OK.
Related Concepts