Configure a Board for Email
Notification-type boards can be configured to notify users outside of WebEOC Nexus. When configured for emails, the subject and content are created from a status board entry. Multiple email options can be applied to a field. For example, a single field can be part of both the Subject and Body of the email.
An email server must be configured to enable the email function.
To configure a board for email
-
In the main menu, click the workflows icon
 . The Workflows page opens.
 -
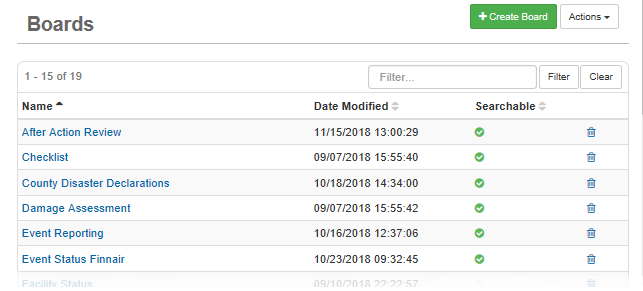
On the Boards tab, click the name of the board intended for notifications.

-
On the Board: Edit Board page, click Board Editor.
-
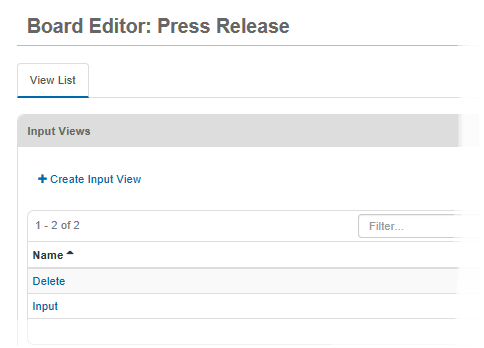
On the Board Editor: [Board Name] page, click the name of the input view to be configured.

-
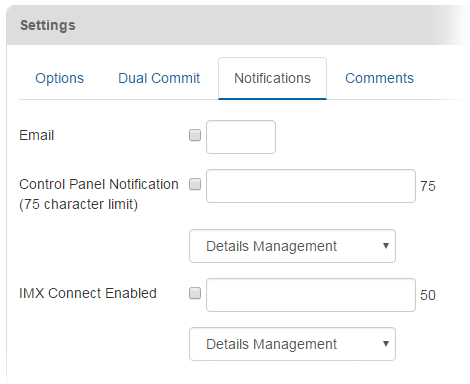
From the input view's tab, scroll down to the Settings section and click the Notifications tab.
-
Select the Email checkbox.

-
Enter the email addresses of all recipients to whom an email should automatically be sent as each new or updated entry is posted to the board.
Tips:-
Multiple email addresses can be entered. Separate email addresses with a comma character only. Do not enter spaces in the Email text field.
-
You can also use an email distribution list.
-
If preferred, email recipients can be selected or added as records are created by following step 12, below.
-
-
Click Save.
-
At the top of the window, click the View List tab.
-
Click the input view you just changed.
-
For each field to be used to select users, positions, or groups as recipients or to enter ad hoc email addresses in the Data Entry window:
For ad hoc email addresses, separate multiple email addresses or distribution lists with a comma.
-
Select the field.
-
Select the Recipient checkbox.
-
Click Apply.

-
-
For each field to be included in the subject line of the email:
-
Select the field.
-
Select the Subject checkbox.
-
Click Apply.

-
-
For each field to be included as part of the email message:
-
Select the field.
-
Select the Message checkbox.
-
Click Apply.

-
-
Click Save.
If multiple fields are configured as “subject” or “message,” specified fields are respectively concatenated (combined together) to form the Subject or Message portion of the email, as applicable.