Subscribe to a Shared Board
If you belong to a JX network where another organization has shared boards with you, you must subscribe to the boards to access them. When subscribing, you can choose to either download historical data or ignore it. Downloading historical data gives you access to all past contributions, while ignoring it starts your board fresh, without access to any previous data.
After subscribing, you need to assign access to it through feature groups, in the same way as you would with any other board.
When an organization publishes a board, they publish either:
-
The whole board
-
Board data only
-
A board with a parent and child view
To subscribe to a shared board
-
In the main menu, click the JX Networks icon
 . The Networks page opens.
 -
Locate the network with the board to subscribe to, and click the row. The networks detail page opens.
-
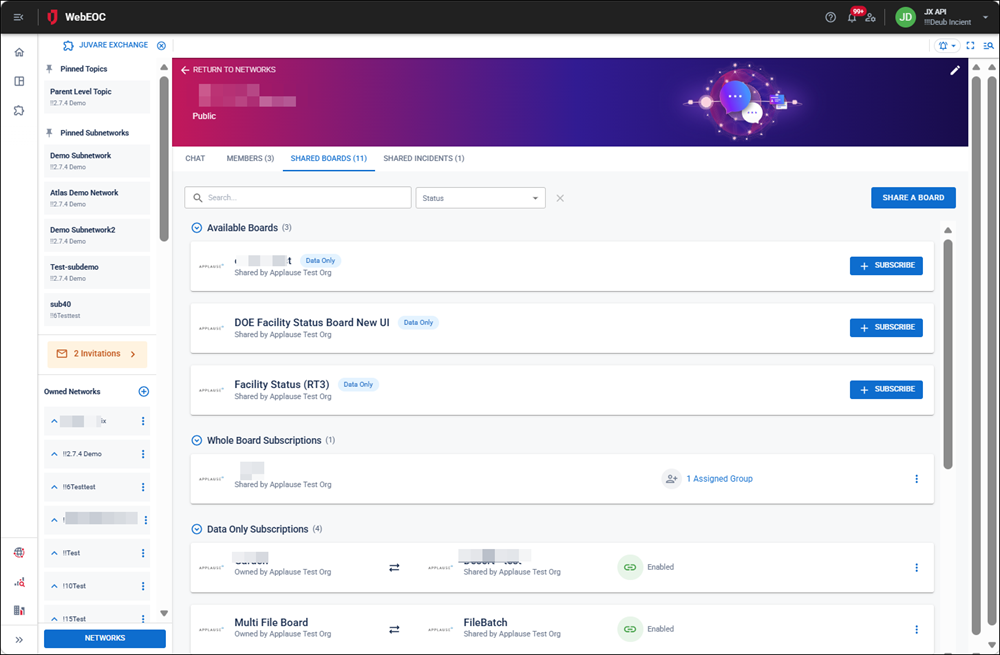
Click the Shared Boards tab. The list of shared boards opens with filter and subscribe options.
-
On the board you want to subscribe to, click Subscribe. The Subscribe to [Board Name] dialog opens.
-
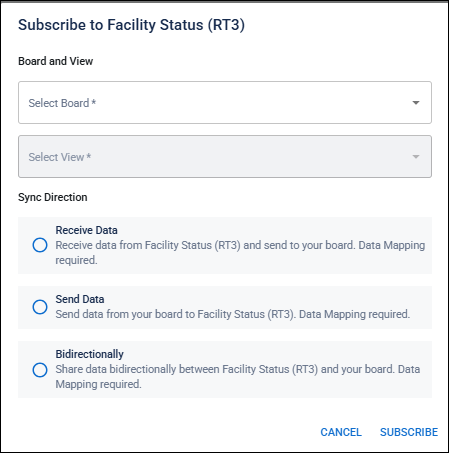
If you are subscribing to a data-only board, in the Board and View drop-downs, select the local board and view to use when mapping the data.
.
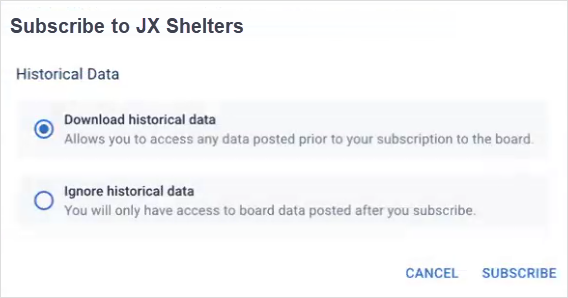
If you are subscribing to a whole board, the Subscribe to {Board Name] displays like this.
-
Select either Download historical data or Ignore historical data, and then click Subscribe. A message is displayed to confirm that you are now subscribed to the board.
-
Click Close.
-
On the Shared Boards tab, click the Assigned Group link for the row containing the board subscription. The Group Assignments for [Board Name] window opens.
-
Click Add New Group Assignment.
-
In the Group drop-down, select the name of the WebEOC Nexus feature group
 A group that grants positions access to features such as boards, maps, links, menus, and plug-ins. that should access this subscription board.
 -
Select the board’s view in the drop-down.
-
Select a filter if needed in the drop-down.
-
In the Default Label field, either leave the label or update as needed.
-
In the Display drop-down, select the Display view that the feature group should access.
-
Click Board Permissions and select the checkbox for each permission type the feature group should have.
-
Click Save.
-
Continue with mapping the data from the subscription board to the local board. See Map Data for a Shared Board for details.
To subscribe to a shared board with a parent and child view
Features related to parent-child views in Juvare Exchange (JX) require WebEOC Nexus 10.19 and later.
-
In the main menu, click the JX Networks icon
. The Networks page opens. -
Locate the network with the board to subscribe to and click the row. The networks detail page opens.
-
Click the Shared Boards tab. The list of shared boards opens with filter and subscribe options.
-
On the board you want to subscribe to, click Subscribe. The Subscribe to [Board Name] dialog opens.
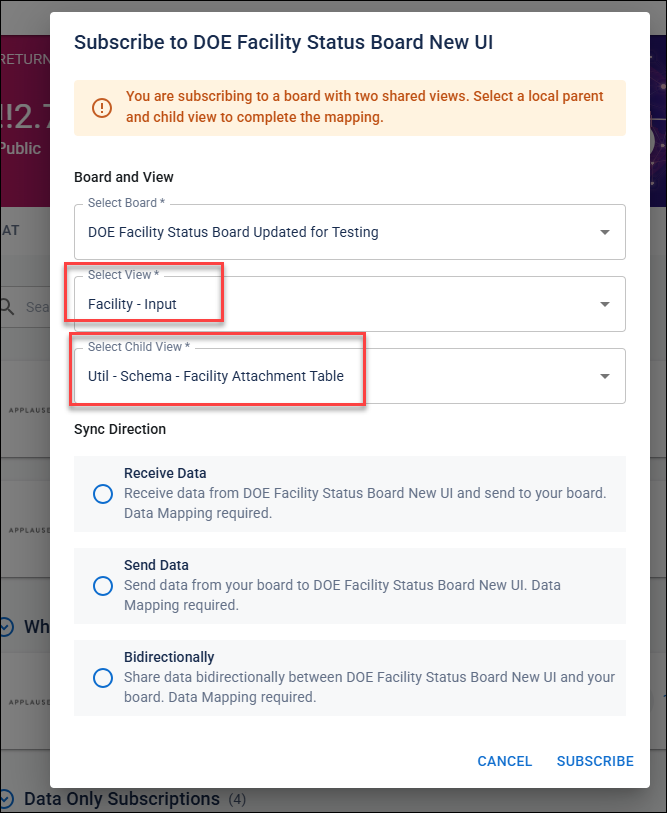
A message displays at the top of the dialog stating that you must select local parent and child views to complete the mapping.
-
In the Select Board drop-down, select the local board that contains the parent-child view to map.
-
In the Select View drop-down, select the local parent view.
-
In the Select Child View drop-down, select the local child view.
-
Select either Download historical data or Ignore historical data, and then click Subscribe. A message is displayed to confirm that you are now subscribed to the board.
-
Click Close.
-
On the Shared Boards tab, click the Assigned Group link for the row containing the board subscription. The Group Assignments for [Board Name] window opens.
-
Click Add New Group Assignment.
-
In the Group drop-down, select the name of the WebEOC Nexus feature group that should access this subscription board.
-
Select the board’s view in the drop-down.
-
Select a filter if needed in the drop-down.
-
In the Default Label field, either leave the label or update as needed.
-
In the Display drop-down, select the Display view that the feature group should access.
-
Click Board Permissions and select the checkbox for each permission type the feature group should have.
-
Click Save.
-
Continue with mapping the data from the subscription board to the local board. See Map Data for a Shared Board for details.
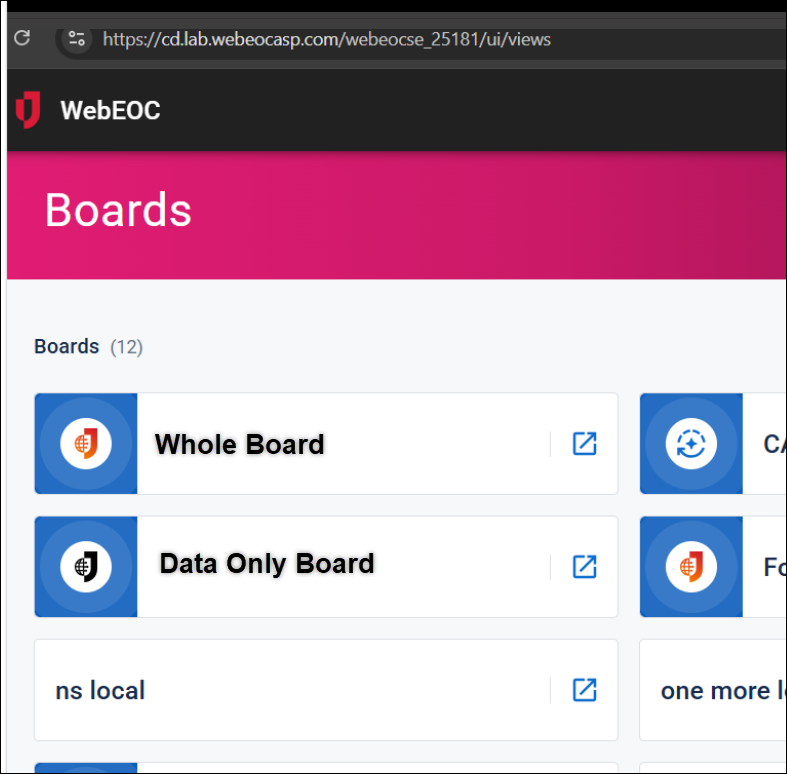
After you subscribe to a board, it displays on the Boards page with JX icons. A colored icon indicates you have subscribed to the whole board. A black icon indicates the board’s subscription is data only.