Add Board Scheduler to a Board
Adding Board Scheduler to a board involves adding it to both the board’s Input and Display views.
To add Board Scheduler to a board’s Input view
-
In the main menu, click the workflows icon
 . The Workflows page opens.
 -
On the Boards tab, locate the appropriate board and click its name.
-
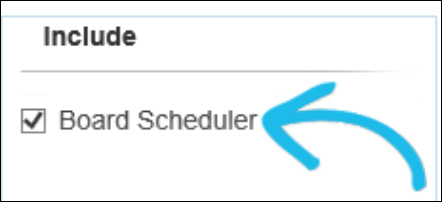
In the Include section, select the Board Scheduler checkbox, and then click Save.
-
Locate the board again and click its name.
-
In the Tools section, click Board Editor.
-
Click the name of the appropriate Input view.
-
Using the view editor, add the following tags to the view:
-
Subject : Title of the event. This field is required.
Copy Code<input type="text" name="subject" size="40"></input> -
Start Date/Time: Start date of the event. This field is required.
Copy Code<input type="text" name="start" size="20" value="_currentdatetime"></input> -
End Date/Time: End date of the event. This field is required.
Copy Code<input type="text" name="stop" size="20" value="_currentdatetime"></input> -
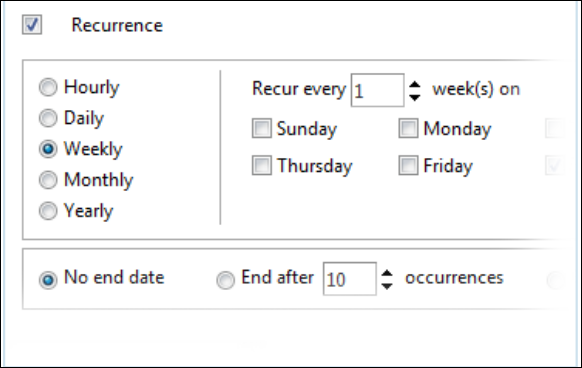
Recurrence: Whether the event is recurring. This field relies on information from the Start Date and End Date fields. Thus, if using Recurrence, include those fields in the board’s Input view.
Copy Code<boardrecurrenceeditor width="100%" frameborder="0"
id="boardrecurrenceeditor"><startdatefield name=
"start"></startdatefield><enddatefield
name="stop"></enddatefield></boardrecurrenceeditor> -
Type: Type of event.
Copy Code<select name="type" list="Board Scheduler Event Type"></select>
-
-
Click Save.
You can define the options in the Board Scheduler Event Type list using the Lists Manager.
Additionally, you can add or remove event types and change the background color that appears in the board for each using the color defined for individual list items.
To add Board Scheduler to a board’s Display view
-
In the main menu, click the workflows icon
 . The Workflows page opens.
 -
On the Boards tab, locate the appropriate board and click its name.
-
In the Tools section, click Board Editor.
-
Click the name of the appropriate Display view.
-
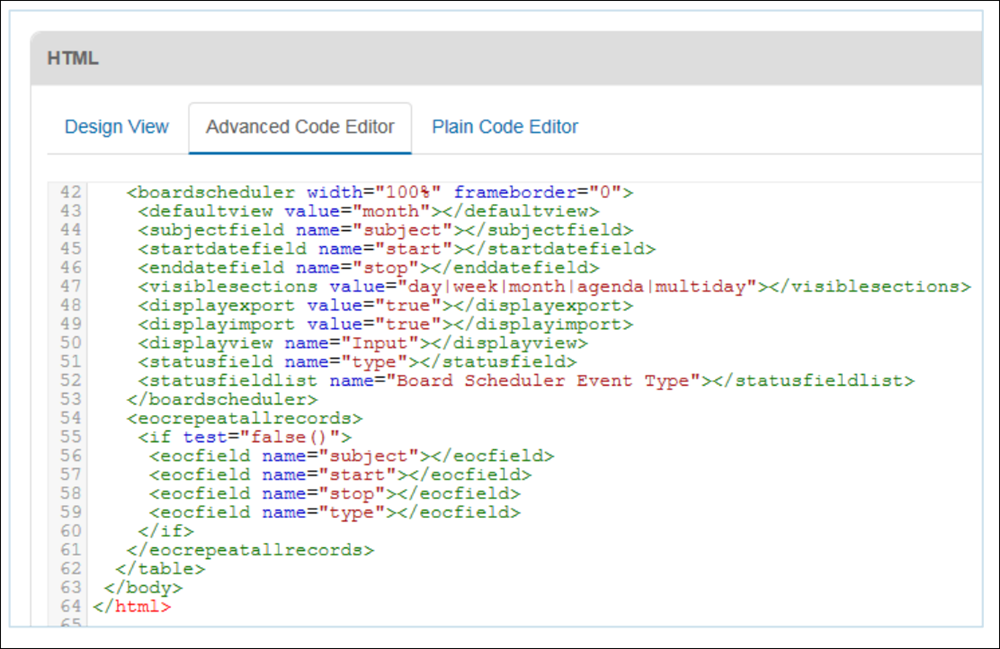
In the HTML editor, click the Advanced Code Editor tab and locate the <eocrepeatallrecords> tag.
-
Paste the following code directly above it.
See Board Scheduler Tags for tag descriptions and configuration options.
Copy Code<boardscheduler width="100%" frameborder="0" >
<defaultview value="month" />
<subjectfield name="subject" />
<startdatefield name="start" />
<enddatefield name="stop" />
<visiblesections value="day|week|month|agenda|multiday" />
<displayexport value="true" />
<displayimport value="true" />
<displayview name="Input" />
<statusfield name="type" />
<statusfieldlist name="Board Scheduler Event Type" />
</boardscheduler>

-
Add the following code directly below the <eocrepeatallrecords> tag.
Field names must match those defined in the Input view and required fields must be present.
Copy Code<if test="false()">
<eocfield name="subject" />
<eocfield name="start" />
<eocfield name="stop"" />
<eocfield name="type" />
</if>
-
Click Save.

