Use Tagging With a Board
Enabling tags for a board's Input view makes it possible to tag records in the board. To work with tags, dedicated fields for tag storage are required.
Enabling tag search for a board’s Display view allows users to search board records by tags. To enable tags for a board, you must enable tags for both the Input and Display views of the chosen board.
Once enabled for both views, when users create new records, they can select one or more tags to associate with a record. The more tags you select, the more specific your searches become. If you search by more than one tag, WebEOC Nexus looks for items with all indicated tags applied.
To enable tagging for a board’s Input View
-
In the main menu, click the workflows icon
 . The Workflows page opens.
 -
On the Boards tab, locate the appropriate board and click its name.
-
In the Include section, select the Board Tagging check box and then click Save.
-
Locate the board and click its name again.
-
In the Tools section, under the Edit subsection, click Board Editor.
-
Click the name of the appropriate Input view.
-
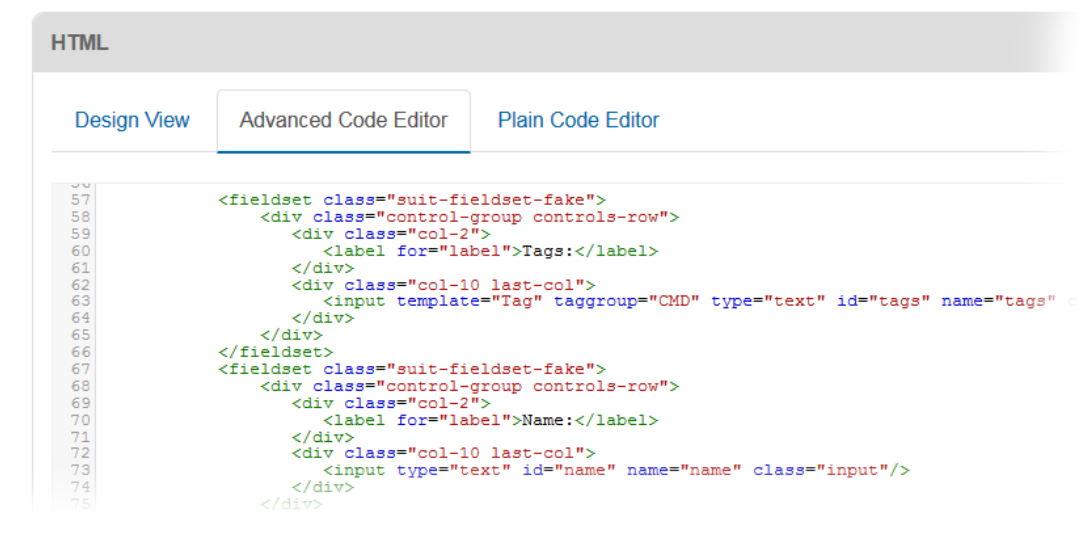
In the HTML section, click the Advanced Code Editor tab.
-
Add template="Tag" tag group="group name" attributes inside the <input/> tag, where "group name" is the name of a tag group you want to associate with the field.
For example:
<input type="text" name="field_name" template="Tag" tag group="group name"></input>
-
Click Save.
To enable tag search for a board’s Display view
-
Continuing from the procedure above, on the Board Editor page, click the name of the appropriate Display (list) view.
-
In the HTML section, click the Advanced Code Editor tab.
-
Select the area where you want the tag search field to appear.
-
Add
<tagsearch field="field_name" taggroup="group name"/><clearsearchbutton/>, where "group name" is the name of a tag group associated with the field and "field_name" is the name of the field. -
Click Save.
To apply tags to board records
-
In the main menu, click the workflows icon
. The Workflows page opens. -
On the Boards tab, locate the appropriate tagging-enabled board and click its name.
-
Either create a record or click an existing record’s Edit link.
-
Add information and make your changes as needed.
-
For Tags, do one of the following:
-
Begin typing the name of the tag and then select the appropriate tag from the list.
-
Click the down arrow and select the applicable tag from the list of available tags.
-
-
Click Save.
To perform a tag search from a board’s List view
-
In the main menu, click the workflows icon
. The Workflows page opens. -
On the Boards tab, locate the appropriate tagging-enabled board and click its name.
-
For Tags, do one of the following:
-
Begin typing the name of the tag and then select the appropriate tag from the list.
-
Click the down arrow and select the applicable tag from the list of available tags.
-
-
Click Search.
To remove all the tags from the search field and reset filtering based on tags, click Clear Search.