View and Validate Resident Self-Reports
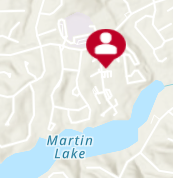
Once Resident Self-Reports have been submitted, they can be viewed on a map by opening your incident on the Crisis Track homepage and selecting Operations View. Resident Self-Reports are symbolized by a person icon enclosed in a red circle.
Video: How To View Resident Self-Reports ![]()
Additionally, submitted Resident Self-Reports appear in the Entries Without a Task task folder in the Tasks module. They have to be assigned to another task so that mobile app users can validate the reports.
After creating a task for validating received Resident Self-Reports, the Resident Self-Reports can then be assigned to that validation task in two ways. Depending on the method you use, you can choose to either keep or delete the record of the initial Resident Self-Report.
-
Log into the Crisis Track Console.
-
In the Existing Incident list, select an incident and click Select.

-
Click the Tasks icon.

-
Select View next to Entries without a Task.
-
Continue with one of the methods below.
-
Select the checkboxes next to the Resident Self-Reports you want to assign for follow-up.
-
In the top right corner of the screen, select Edit then click Copy. The Copy Entries window opens.
-
Select Residential Damage from the Form menu.
-
Select the task that was created to confirm resident self-reports. The Residential assessment will be assigned to this task.
-
Click Save.
-
Click Edit in the row of the Resident Self-Report you would like to change to a Residential Damage Assessment form.
-
In the Form field, change the form to Residential Damage. You will be asked to confirm the change.
-
In the Task field, change to your follow-up task and click Confirm.
-
Change the Status to Assigned.
-
Click Save.
This will allow you to keep a record of the initial Resident Self-Report, in addition to transferring all of the info into the Residential form.
Video:How To Copy the Resident Self-Report information into a Residential form ![]()
The entries will now appear in the validation task and can be assigned to a team.
This will transfer all of the info from the Resident Self-Report into the Residential Damage Assessment form and will not leave a copy of the initial resident self-report.
Video:How To Change the Resident Self-Report into a Residential Damage Assessment Form ![]()
The entry will now appear in your validation task and can be assigned to a team.