Create a Request
You can also create a request by cloning a request.
To create a request
-
On the Requests/Tasks tab, click Create New.

The New Request page opens.
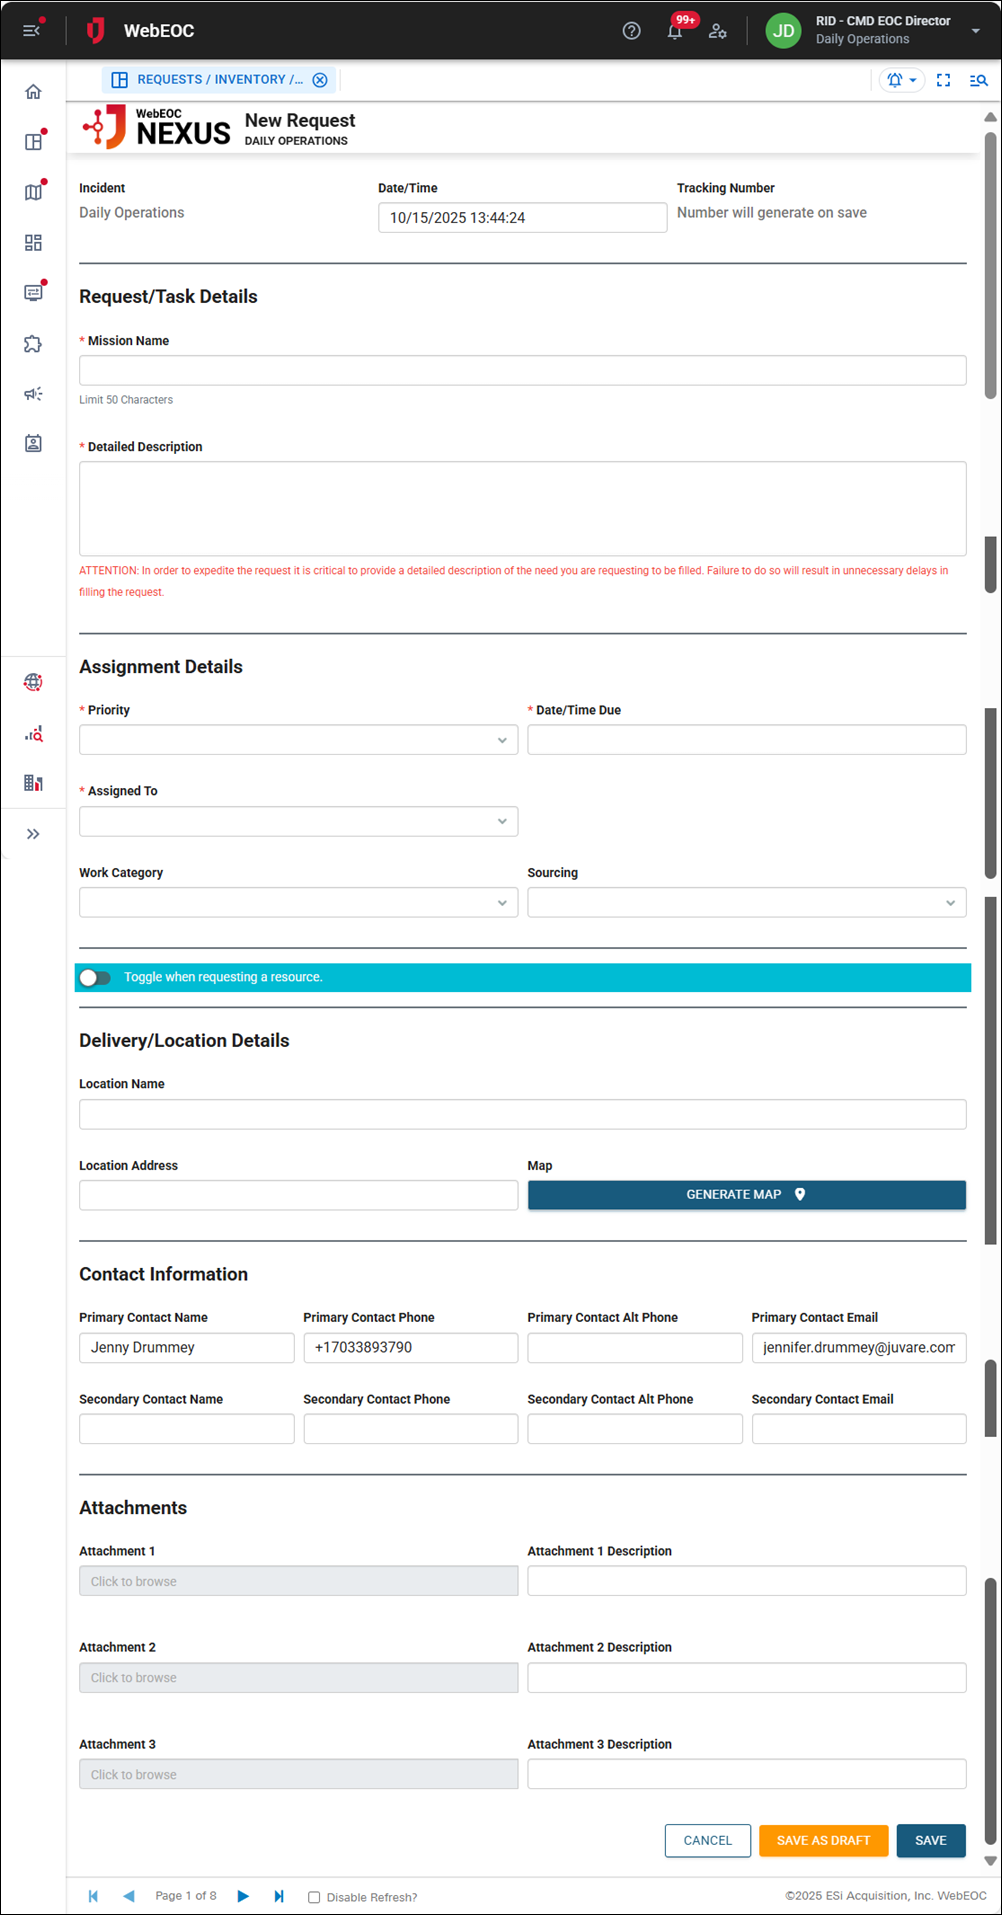
The form automatically populates the current date and time. After the record is saved, a unique tracking number for the request is generated.
-
In the Request/Task Details section, in the Mission Name field, enter the mission name.
-
In the Detailed Description field, provide details about the request. Ensure you supply enough information to fully describe the need.
-
In the Assignment Details section, in the Priority dropdown, select the request's priority, which sets when the request will be due. The Date/Time Due field populates based on this selection.
-
In the Assigned To dropdown, select the position responsible for fulfilling the request. The request will be routed to this position after you save the record.
The positions in this dropdown are based on how your board is configured and your permissions. You may not have permission to assign requests to another position, in which case the Assigned To dropdown does not display.
-
In the Work Category dropdown, select the category of the work request, if needed.
-
In the Sourcing dropdown, select the request source, if needed.
-
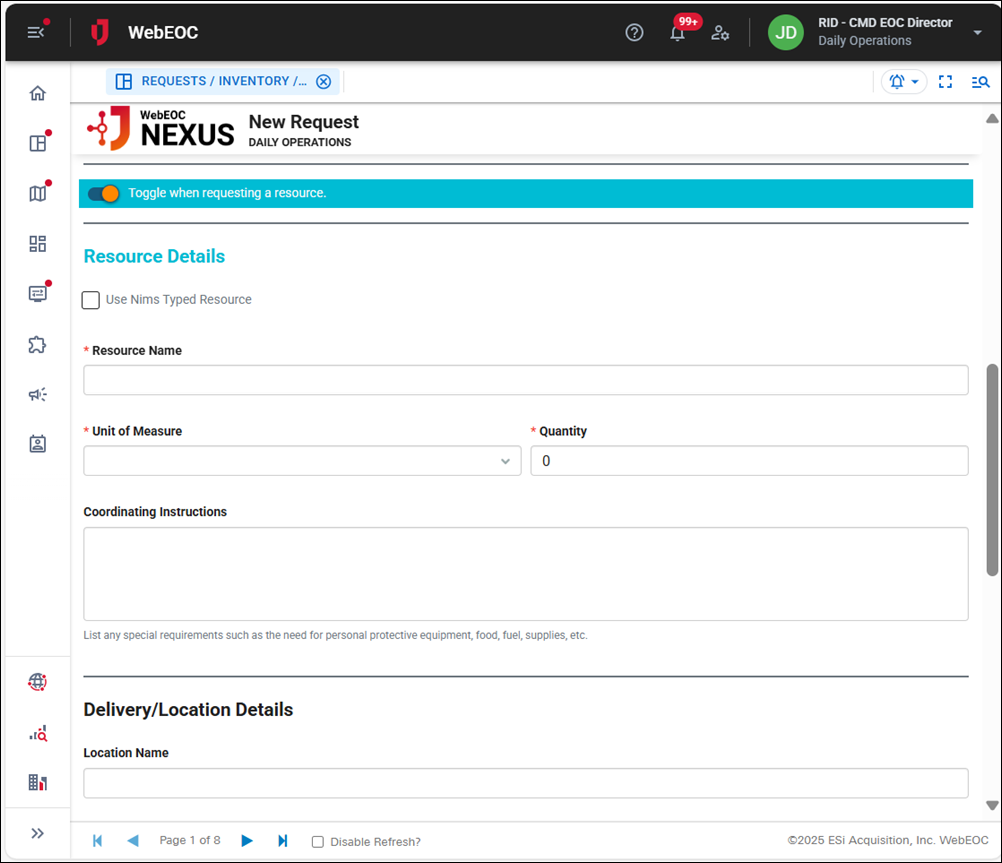
Click the Toggle when selecting a resource toggle to on, if applicable.
If you do not click the toggle, this request will be considered a task request instead of a resource request.
-
If you turn the toggle on, the Resource Details section displays.
-
If you are requesting a NIMS type resource:
-
Select the Use Nims Typed Resource checkbox.
-
Select the appropriate options from the NIMS Group, NIMS Definition, and NIMS Type dropdowns.
-
-
If you are not requesting a NIMS type resource, in the Resource Name field, enter the name of the resource.
-
For both types of resources:
-
in the Unit of Measure dropdown, select the unit for the resource.
-
In the Quantity field, enter the number of units.
-
In the Coordinating Instructions field, list any special requirements, such as the use of PPE.
-
-
In the Delivery/Location Details section, completed for both task and resource requests, enter the Location Name where the resource should be delivered or the task performed.
As you type, deployment location names that have been configured display for selection.
-
In the Location Address field, enter the address where the request should be delivered or the task performed.
-
Click Generate Map to generate a map of this address.
-
The fields in the Contact Information section are automatically populated with your information. They can be updated. Complete all necessary fields in this section to contact the person about delivering the resource or fulfilling the task request.
-
In the Attachments section, click in the Attachment field to upload an attachment to support the request, such as a work order or a receipt.
-
Click Save in the bottom right.
After the record is saved, depending on how the board is configured, a notification may be sent to the position assigned to the request. See Configure Board Notifications for more information.