Import Records and Map Fields on the Air and Cruise Board 
Add-on boards must be purchased separately and require a license key to import. Once they are imported, they cannot be exported. Contact your Client Success Manager (CSM) for more information.
When using the Air and Cruise Module in combination with the import features of Board Data Manager, importing manifests and other passenger information is quick and easy. The processes on this page describe how to import records and map fields to populate data in Air and Cruise tables.
Import Records into an Air and Cruise Board
As an administrator, you can import records into any board using the Board Data Manager (BDM). To help organize the information you want to import, you can use the WebEOC Nexus template available for the Air and Cruise Module.

If you use the template, you only need to include the fields that apply. If you do not want to include or cannot supply information for certain columns (fields) or worksheets (tables) in the template, delete those columns or worksheets. Because of the configurability of BDM and WebEOC Nexus’s adaptability, you can choose the exact fields you want reflected in tables.
You can import data from any existing .XLSX or .CSV file.
To import data into Air and Cruise tables
-
In the main menu, click the workflows icon
 . The Workflows page opens.
 -
On the Boards tab, locate the appropriate Air and Cruise board and click its name. The Board: Edit Board page opens.
-
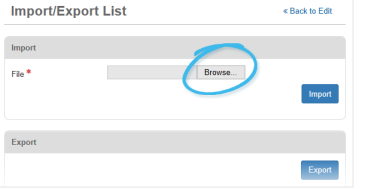
In the Tools section, click Import/Export Data. The Import/Export Data: [Board Name] page opens.
-
To locate the file for import on your computer, click Choose File or Browse, followed by Import.
When WebEOC Nexus imports records, it verifies that each field contains data in the appropriate format. For example, if you entered text into a field that required numbers, WebEOC Nexus flags this. Unless records with flags are resolved, they are skipped during the import process.
After you click Import, you are taken to the Import Map: [Board Name] page. This page allows you to map columns in the file you just imported to their associated fields in Air and Cruise Module tables. By mapping this data, the tables in WebEOC Nexus update with the applicable data from the .XLSX or .CSV file.
Mapping Fields
On the Import Map page, you select the Table Name, indicating the table where the data will be imported. The fields available for mapping depend on the Table Name you select.
The Unique Field dropdown list allows you to determine whether records are updated or inserted during import. If the value you select for Unique Field matches in both the imported file and the table, WebEOC Nexus updates the record. If a match is not found, the record is inserted as a new record.
Additionally, if the Unique Field is left as Unused, all imported records are inserted as new records.
Mapping fields ensures records are imported correctly. The first row of the imported spreadsheet file is displayed and used for field mapping purposes, facilitating the mapping of fields in the import file to fields in the table. When the values found in the first row of the import field match field names in the table, WebEOC Nexus automatically completes the mapping, greatly reducing the time it takes to complete the import process. However, if the values in the first row do not match field values in the selected table, you must map fields manually.
If you are importing multiple tables, these are represented as different tabs on the Import Map page and the actions above apply to each table. If you are importing a spreadsheet with multiple worksheets, and if the worksheet names match the table names in WebEOC Nexus, the tables are automatically mapped. If the worksheet names do not match the table names, you must select the tables manually.
To map fields
This example procedure outlines how to map fields using an imported spreadsheet file, which includes both passengers and passports, into the WebEOC Nexus Air and Cruise module.
-
On the Import Map page, select the AIR Passenger Table tab.
-
For Table Name, select AIR Passenger Table.
The Table Name will automatically populate with the appropriate value if the imported file worksheet was named to match the table name in WebEOC Nexus.
-
For Unique Field, select pgr_uniquepassengerid. Selecting this option directs WebEOC Nexus to associate imported passengers according to the unique passenger ID. If the passenger is already present, data will be updated.
-
Select fields to map to the columns being imported.

This will automatically populate with the appropriate mapping if the first row values in the import file match the field names in WebEOC Nexus. If you do not want data in a certain column to be mapped, select Unused. If marked as Unused, a column and its data, if available, are not included in the final import.
Once a field is mapped, that option is no longer available in the dropdown list when mapping remaining columns. This shortens the list and prevents double-mapping.
-
Select the AIR Passport Table tab.
-
For Table Name, select AIR Passport Table if not already selected.
-
For Unique Field, select the identifier that will determine whether WebEOC Nexus updates or inserts a record. For passports, a commonly selected option is ppt_number.
-
For the pgr_uniquepassengerid column, select pgr_uniquepassengerid(AIR Passenger Table).
-
Select fields to map to the remaining columns being imported if not already mapped.
-
To verify data mapping is accurate and records are appropriately being inserted or updated, select Preview.

-
To finalize the importing of data, select Import. Alternatively, to abort the process, select Cancel.