Configure Email with OAuth 2.0
In WebEOC Nexus 10.12.1 and later, for new installations, board email notifications are handled through the Juvare Alert Service, not SMTP. If you are upgrading and rely on SMTP to send board email notifications, you can continue to use SMTP, or switch to the Juvare Alert Service. See Upgrade to the Juvare Alert Service for Board Email Notifications for more information.
On October 1, 2022, Microsoft will no longer support Basic Authentication. After this date, clients that use a M365 SMTP relay will no longer be able to send emails using Microsoft 365 through their connection to WebEOC Nexus.
To continue using Microsoft 365 with WebEOC Nexus, you must update your authentication information and re-authenticate.
Custom email servers and other service providers that use IMAP or POP3 are not affected. If you do not use Microsoft 365, you do not need to re-authenticate with the following procedure.
Before you perform the following procedure, obtain your Client ID and Tenant ID from Microsoft. You will need to enter these IDs during the procedure.
To configure your WebEOC Nexus settings and re-authenticate using SMTP credentials
-
In the main menu, click the notifications icon
 . The Notifications page opens.
 - Click the Email Configuration tab.
-
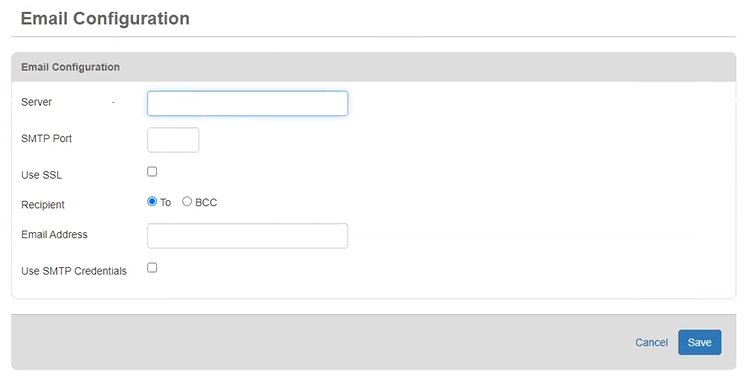
In the Server field, delete the server information.
-
Select the Use SSL checkbox.
-
In the Email Address field, enter the email address that appears on the notifications.
-
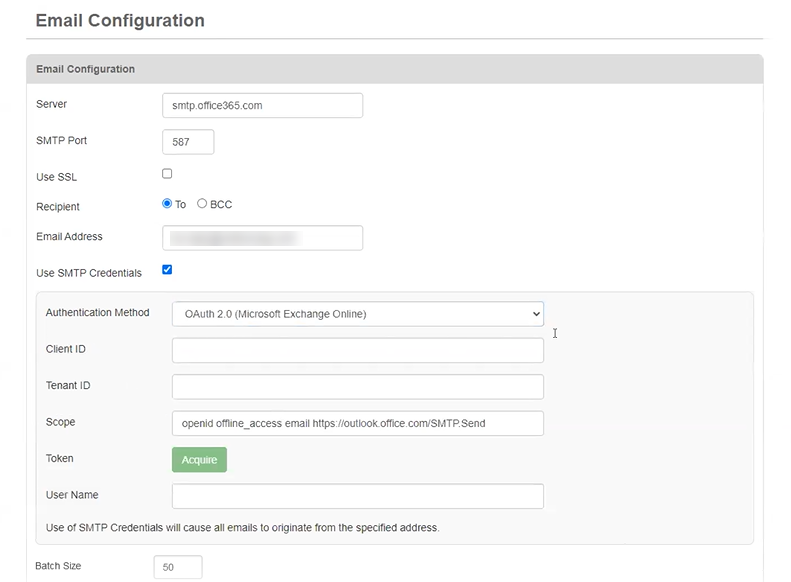
Select the Use SMTP Credentials checkbox. Authentication fields appear at the bottom of the page.
-
For Authentication Method, select OAuth 2.0 (Microsoft Exchange Online). The following actions take place:
-
The Server and SMTP Port fields are automatically completed with default Microsoft SMTP mail services information. If your SMTP email relay service does not use this default configuration, modify the information in the fields.
-
The fields below the authentication method change to accommodate your selection.
-
The Scope field is automatically populated.

-
-
Enter the information that you obtained from your SMTP Server provider:
-
In the Client ID field, enter your client ID in a valid Globally Unique Identifier (GUID) format.
-
In the Tenant ID field, enter your tenant ID in a valid GUID format.
-
-
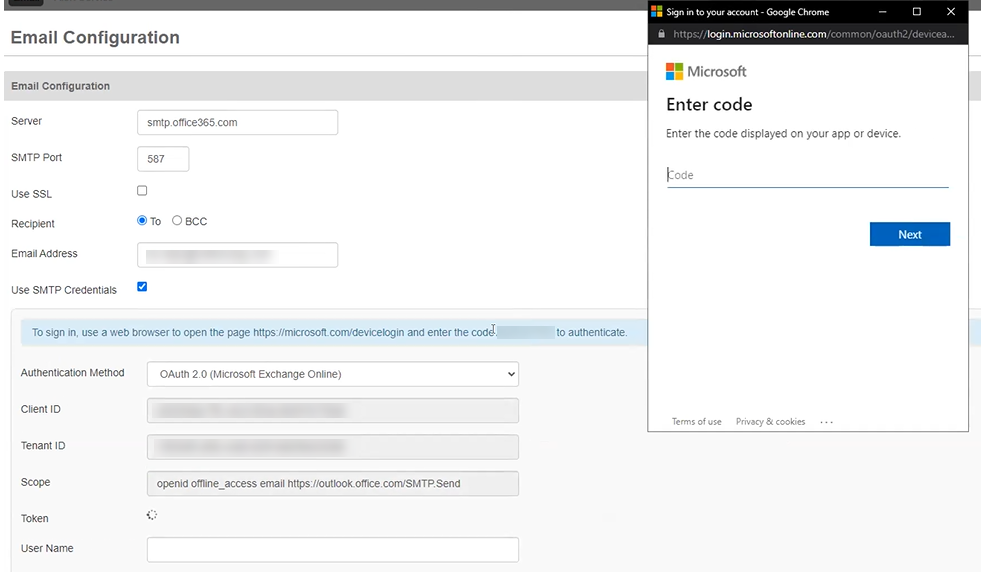
Click Acquire. The following actions take place:
-
A token code is generated. It appears, highlighted in blue, above the Authentication Method field.
-
The first in a series of Microsoft and Juvare windows appears.

-
-
Copy the token code (only the code), paste it into the Code field, and then click Next.
-
In the next Microsoft account window, select the account that you want to authenticate.
If a Juvare window appears that requests more information, click “Skip for now” and then click Next.
-
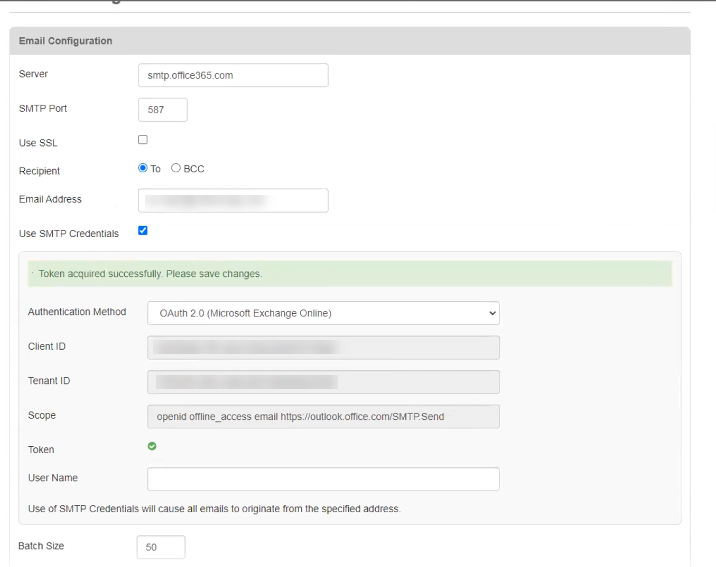
At the “Are you trying to sign in to WebEOCECMPluginOAUTH?” prompt, click Continue, and then close the last window in the series. Juvare acquires and authenticates the token. After the successful completion of the authentication, a confirmation message, highlighted in green, appears above the Authentication Method field.

-
In the User Name field, enter the email address that you used to authenticate.
-
For Batch Size, if necessary, modify the number of recipients. The default value is 50 recipients.
This field is used for the AWS SES mail server.
-
Click Save. Authentication is complete.
