Navigate Maps

When you access Maps and select a map from the landing page, the map opens.

Map Example Screenshot

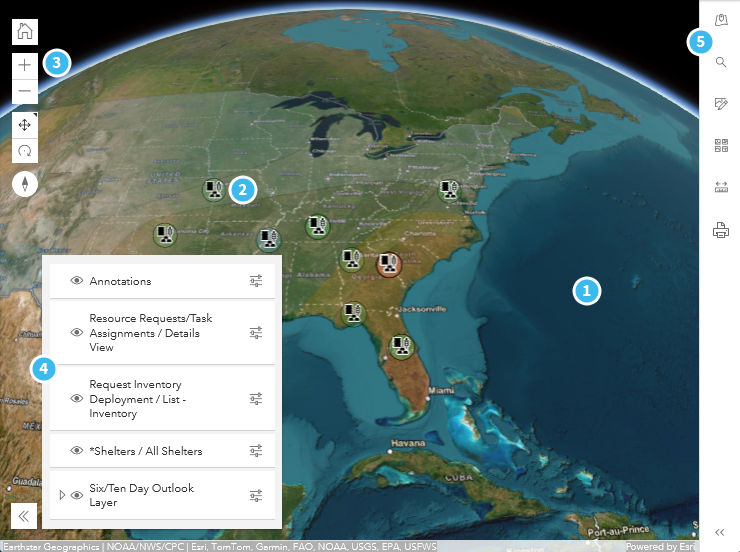
The map contains numerous tools that you use to find map and board data locations, add annotations, measure distances and calculate areas, and display and hide map layers that include annotations and board data. These tools are located along the sides of the map.

The numbers in the following table correspond to the numbers on the example map (above). When applicable, procedures are provided. In cases where additional information and more detailed procedures are available, a link is provided.

Maps description of screenshot
Number Description Procedure
Number 1 Icon

The map.


Number 2 Icon

The data points from a WebEOC Nexus board. To view the legend for a data point, see Number 4 Icon.

To view more information about a data point

  1. Click a data point.

  2. Do any of the following actions.

    • Click Open View to open the record.

    • Click Zoom to to zoom into the area surrounding the point.

    • Click the Dock icon Dock Icon to move the window to the right side of the map. To return the docked window to the data point's location, click the Undock icon Undock Icon.

    • Click X to close the window.

Number 3 Icon

The map tools that allow you to zoom, pan, and rotate the map.

To zoom in/out

  1. Do either of the following actions.

    • Click Zoom In Icon to zoom in.

    • Click Zoom Out Icon to zoom out.

  2. Continue to click the icon until the map is at the magnification that you want.

To pan the map

  1. Click the pan icon Pan Icon.

  2. On the map, drag the pointer in the direction you want to pan.

To rotate the map

  1. Click the rotate icon Rotate Icon.

  2. On the map, drag the pointer in the direction you want to rotate.

To reset the map orientation to north/south

Click the reset map orientation icon Reset Map Orientation Icon.

To reset the map to its default location

Click the default map view icon Default Map View Icon.

To reset the map to its default settings

Refresh your browser.

Number 4 Icon

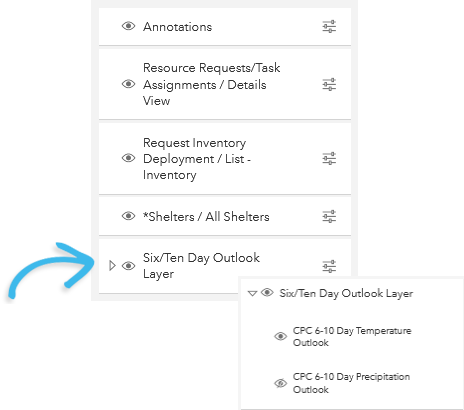
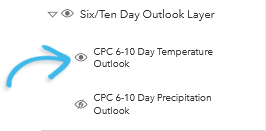
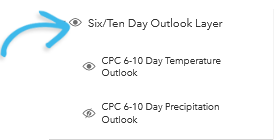
A list that shows or hides layers, annotations, and board data. This list contains all the layers that have been loaded in the map.

Some layers contain additional child layers. When this occurs, an Expand icon Expand Icon appears preceding the Hide layer icon Hide Layer Icon.

Some layers have a legend that indicates what the symbols and/or colors represent. When a legend is available, it appears under the opacity slider.

Child Layer Page Screenshot


To hide or show a layer

  1. Click the Layer List icon Layer List Icon to open the list.

    • To close the list, click the Collapse icon Collapse Icon.

  2. To hide a layers, click the Hide layer icon Hide Layer Icon preceding the layer.

    • A filled icon Visible Layer Icon indicates that the layer is visible.

    • An icon with a strikeout Hidden layer Icon indicates that the layer is hidden.

To hide or show a child layer

  1. Click the Expand icon Expand Icon .

  2. Do either of the following actions.

To hide/show a child layer, click the Hide Layer icon preceding the child layer.

Layer Page Screenshot

To hide all the child layers and the top layer, click the Hide Layer icon at the top level.

Layer Panel Screenshot

To view a layer legend

In the list, on the right side of the layer, click the Show Panel icon Show Panel Icon.

To modify the opacity of a layer

  1. In the list, on the right side of Annotations or a layer, click the Show Panel icon Show Panel Icon.

  2. Drag the slider left or right to modify the opacity.

  3. Click the Show Panel icon to return to the list.

Number 5 Icon

A Tools panel that contains tools that you can use to search geographic locations and points of interest (POI), insert and maintain annotations, select base maps, and measure distances and calculate areas.

Show/Hide the Tool Panel

The Tools panel's compact state displays the icons that represent the tools contained within.

You can fully-expand the Tools panel to view the tool names. See the To access the Tools panel procedure on the right.

To access the Tools panel

  • To fully-expand the Tools panel, at the bottom right, click the Expand icon Expand Icon.

  • To close the Tools panel, click the Collapse icon Collapse Icon.

Geo Search Icon A Geo Search field that finds a geographic location or point of interest (POI). For procedures for searching, see Search Maps.
Board Search Icon A Board Search field that finds a board data point. For procedures for searching, see Search Maps.
Annotations Icon

An annotation widget that allows you to mark areas. You can specify the descriptive text shape, and color of annotation. You can also edit the descriptive text and delete the annotation.

For procedures for annotations, see Add Annotations.

BaseMap Icon

A basemap list from which you can select an alternate basemap. Base maps that appear in the list are configured by your administrator.

To select an alternate base map

  1. Click the expand icon Expand Icon. The available base maps are displayed in a list.

  2. Select an alternate base map. The base map changes.

Distance Measurement Icon The distance measuring and area measurement tools.

To measure a distance on the map

  1. Click the Distance icon Distance Measurement Icon.

  2. On the map, click the start point for the measurement. A box appears under the tools that displays the measurement unit currently in use.

  3. On the map, click the end point. As you move the mouse, the box and a visual indication dynamically update to display the distance.

    • To temporarily disable snapping, press and hold the Ctrl key.

  4. To change the unit of measurement, in the panel, for Unit, select a unit of measurement.

    • To dismiss the measurements, click Clear.

    • To start a new measurement, click New measurement.

To calculate the area and perimeter of a feature

  1. Click the Area icon Area Measurement Tool Icon.

  2. On the map, click the start point.

  3. Click additional points to enclose the area.

  4. To change the unit of measurement, in the panel, for Unit, select a unit of measurement.

Export Map Icon

An Export Map tool that exports the current map, in PDF or image format (PNG), into a new tab in your browser. Your browser tools determine what you can do with the map (for example, save, copy, or print the map).

To export a map

  1. Click the Export Map icon Export Map Icon .

    The Export Map panel opens.

  2. (Optional) Enter a Title for the map.

  3. For File Type, select either PDF or Image.

  4. For Orientation, select either Landscape or Portrait.

  5. (Optional) To include the map legend in your export, click the Include Map Legend toggle.

  6. Click Export. The map opens in a new tab in your browser.

  7. Use your browser tools to manage the map.