-
To perform this procedure, you must be a WebEOC Administrator with Service Account type permissions. Configure this account in WebEOC.
-
Juvare Support may have already created publish profiles for you.
At least one publish profile must exist, before you can create a board in DesignStudio.
To add a publish profile
-
On any page, click the Organization Settings icon
 .
. -
Click Board Settings.

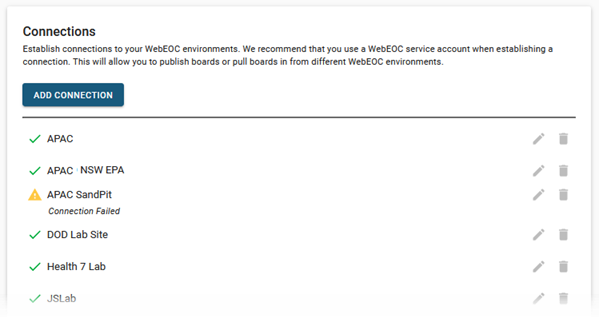
The board publish settings display. The top part of the window provides the publish profile connections that have been configured. Publish profiles contain one or more of these connections. As the connections load, icons indicate the status of the connection:
-
A green checkmark indicates that the connection is successful.
-
A yellow triangle indicates that the connection has failed. Failure can happen due to incorrect information entered as part of the configuration. When a connection fails, you cannot use it for a board. See Board Connections.
-
-
In the Connections area, click Add Connection.
-
In the Create WebEOC Connection window, enter the following information.
WebEOC Connection fields Field Description Procedure Connection Name
The unique name that describes the WebEOC instance.
Enter between 2 - 50 alphanumeric characters, excluding special characters.
You must enter a connection name.
WebEOC URL
The URL of the WebEOC instance to which you want to connect.
Enter a valid https format.
For example, https://www.yourdomain.com/eoc7
Username
An administrator's service account username.
Enter the administrator's credentials.
The administrator's credentials must be set up as a Service Account type in WebEOC.
Password
The password for the administrator's service account username.
Enter between 2 - 50 alphanumeric characters, excluding special characters.
-
Click Done. The connection loads and is validated. You can now add it to your publish profile.
-
At the bottom of the window, click Add Profile.

-
In the Create a Publish Profile window, enter the following information.
Publish Profile fields Field Description Procedure Profile Name
The name of the publish profile.
Enter between 2 - 50 alphanumeric characters, excluding special characters.
Name
The name of the step in the publishing process.
Enter between 2 - 50 alphanumeric characters, excluding special characters.
Connection
The connection that is used for this step.
Select from the drop-down list.
-
If you want to include additional steps, perform the following actions; otherwise, skip this step.
-
Enter a new name for the step.
-
Select the connection.
-
Click + Step.
-
Repeat steps a to c for each step.

-
-
Click Done. To view the publishing details, see View Board Details.