Input views are views where users enter data.
This procedure details how to create a Parent Input view. To create a Child Input view, see Create a Child Input View.
You can also create an Input view as part of creating a board using the board wizard or copying a view.
To create an Input view
-
In the Board Gallery, locate the board for which you want to create an Input view, and then click Design.
- On the upper right, click Create > Input View.
-
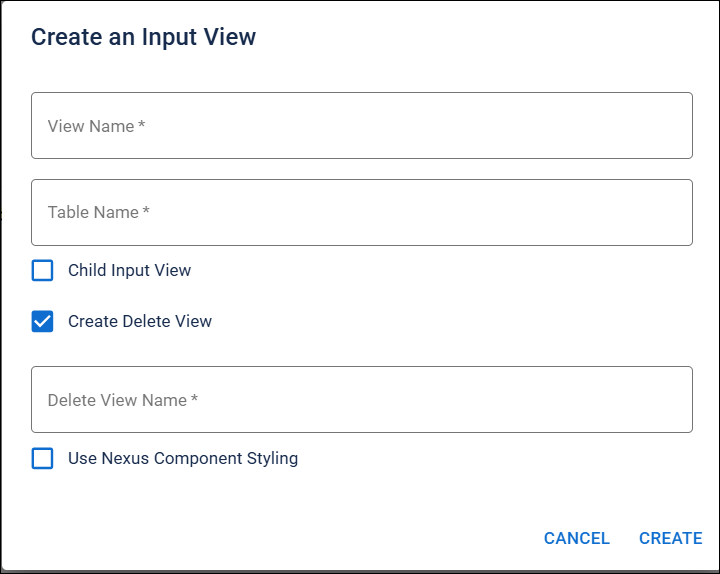
In the Create an Input View window, enter the following information, and then click Confirm.
-
View Name: Enter a name for the view. View names must be unique.
-
Table Name: Enter the name for the data table.
-
Child Input View: Ensure that this box is not selected.
-
Create Delete View: Select this checkbox and then enter a name for the Delete view If you want to create a Delete view at the same time.
-
To use the Nexus Component Styling for components, select the Use Nexus Component Styling checkbox. To use components from DesignStudio 2.5 and earlier, also called Classic Styling, leave the checkbox unselected.
-
The next step after creating the Input view is to add board components.