Manage Networks
Juvare Exchange (JX) was designed to foster communication, collaboration, and sharing between organizations in the JX Community. By developing networks, you can securely share information with other network members to more effectively handle daily operations and prepare for, respond to, and recover from significant events.
As you build relationships across the Juvare Community, you may need to create, edit, or delete the networks you own, or you can browse, join, request membership, and leave other networks.
You can choose public, public by request, and private networks when creating or browsing networks. These permissions or types determine who can see and join the network. Requests to join a network are sent to the Administrator of the organization that owns the network.
To access JX networks
-
In the main menu, click the JX Networks icon
 . The Networks page opens.
The networks you own and those you join are listed here.
-
Use search and filters to locate your networks.
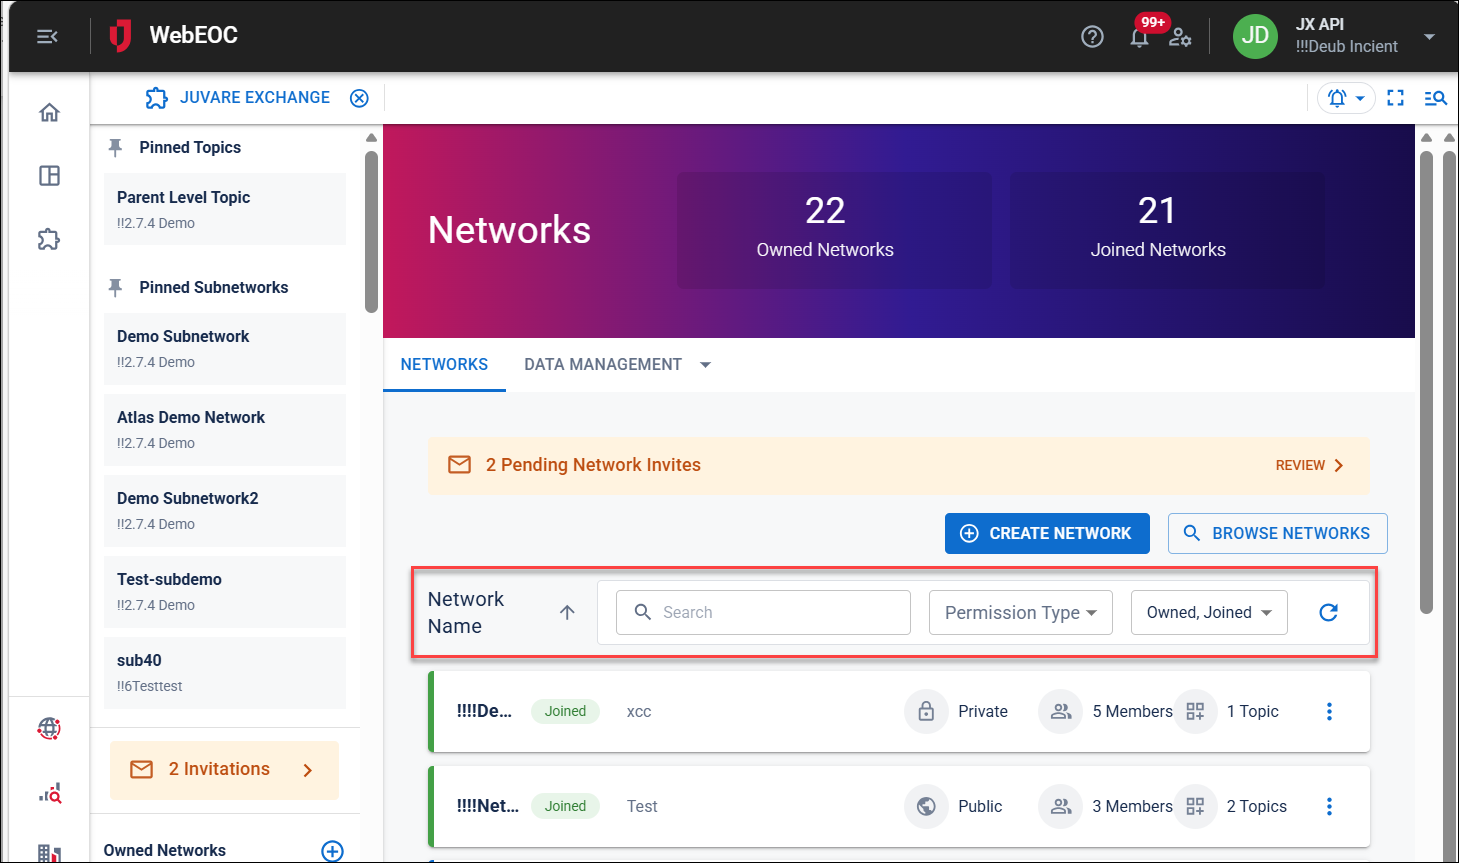
To manage your network, perform any of the following actions:
 To create a network
-
Either:
-
On the Networks page, on the upper right, click + Create Network.
-
On the Directory page, select the checkbox next to the organization you want to create a network with and click the Create Network button in the top right.
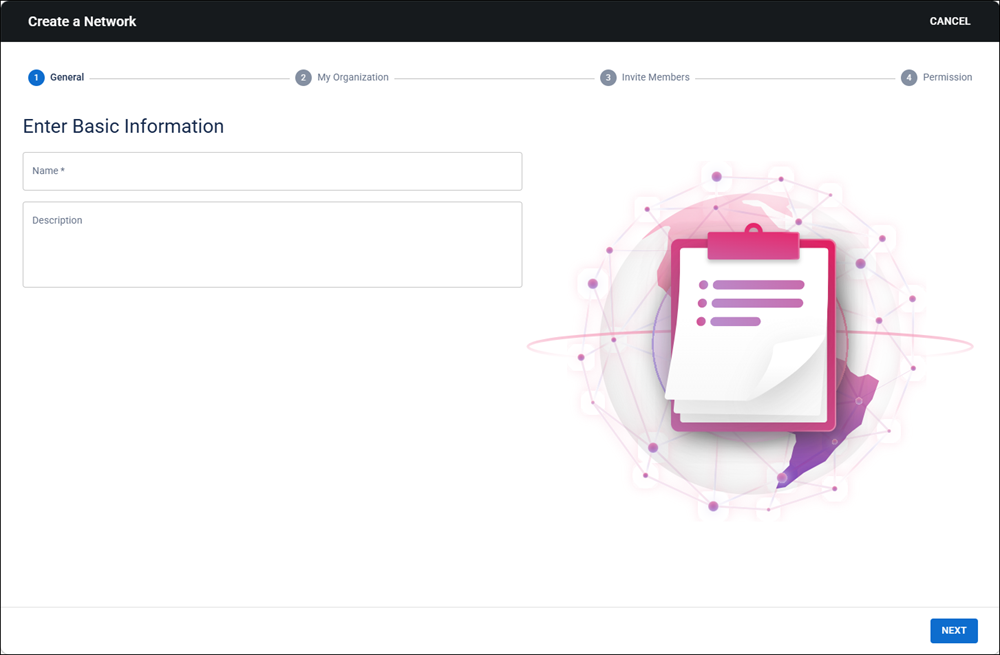
The Create a Network wizard opens on the Enter Basic Information page.
-
-
Enter the Name and Description of your new network.
Be clear and thorough to help people who are browsing and searching for networks to understand the purpose of this network.
-
On the lower right, click Next. The My Organization page opens.
-
Select the checkbox next to the organization to add to the network.
-
Click Next. The Invite Members page opens.
-
Select the checkbox for the organizations or groups that you also want to be members of the network.
-
On the lower right, click Next. The Select Permission Type page opens.
-
Depending on who you want to be able to see and join your network, click Private, Public, or Public by Invitation.
-
Private: No one can see or join the network unless the owner adds or invites an organization.
-
Public: Any organization in JX can see and join the network when browsing.
-
Public by Invitation Only: Any organization can see the network to request access, but the owner organization must approve the request.
-
-
On the lower right, click Finish. The Networks page opens, and your new network appears in the corresponding area.
After you create a network, you are the owner of that network. There is no method of transferring ownership. If you want to remove the network, you must delete it.
To edit or delete an owned network
-
On the Networks page, locate the network you want to update and click the more icon
 on the row.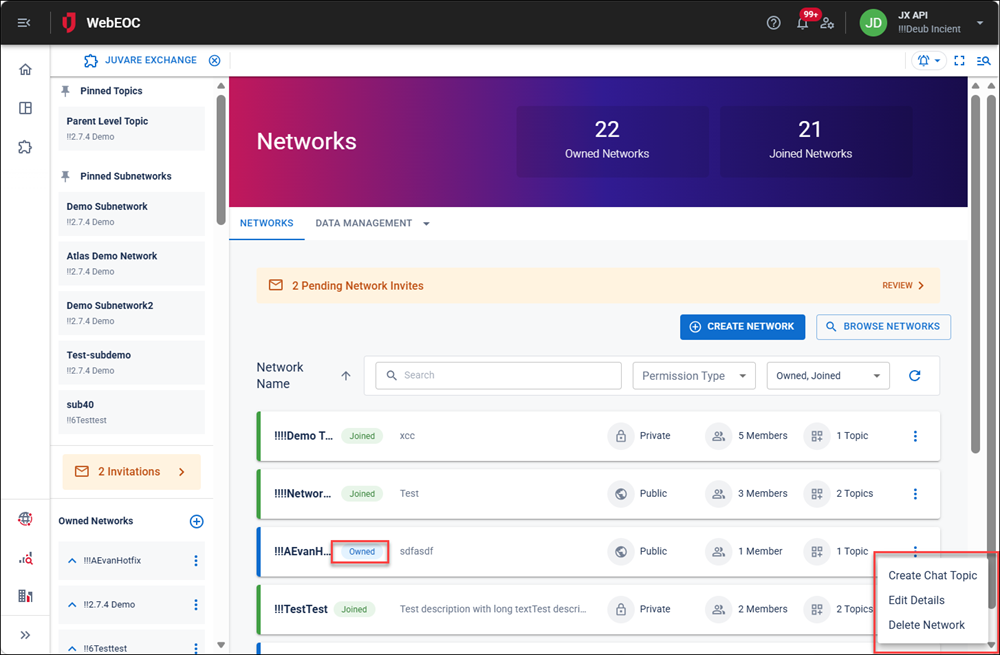
-
Do any of the following actions:
-
Click Edit Details, update the Name, Description, or Permission Type, and then click Save.
-
Click Delete Network, and click Confirm to confirm the action.
-
To set permissions for an owned network
-
In the main menu, click the JX Networks icon
. The Networks page opens. -
On the owned network to set permissions for click the more icon
and select Edit Details. The Edit Network window opens. -
In the Permission Type section select an option:
-
Private: No one can see or join the network unless the owner adds or invites an organization.
-
Public: Any organization in JX can see and join the network when browsing.
-
Public by Invitation Only: Any organization can see the network to request access, but the owner organization must approve the request.
-
-
Click Save.
To add or remove members of a network on the Networks page
-
In the main menu, click the JX Networks icon
. The Networks page opens. -
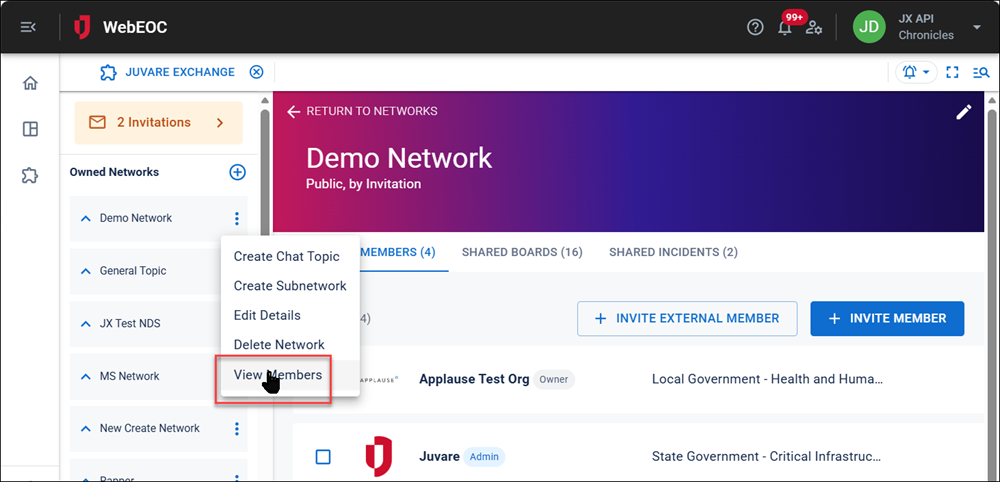
Locate the network you want to update and click the Members column in the row. The network’s details page opens, with the Members tab open.
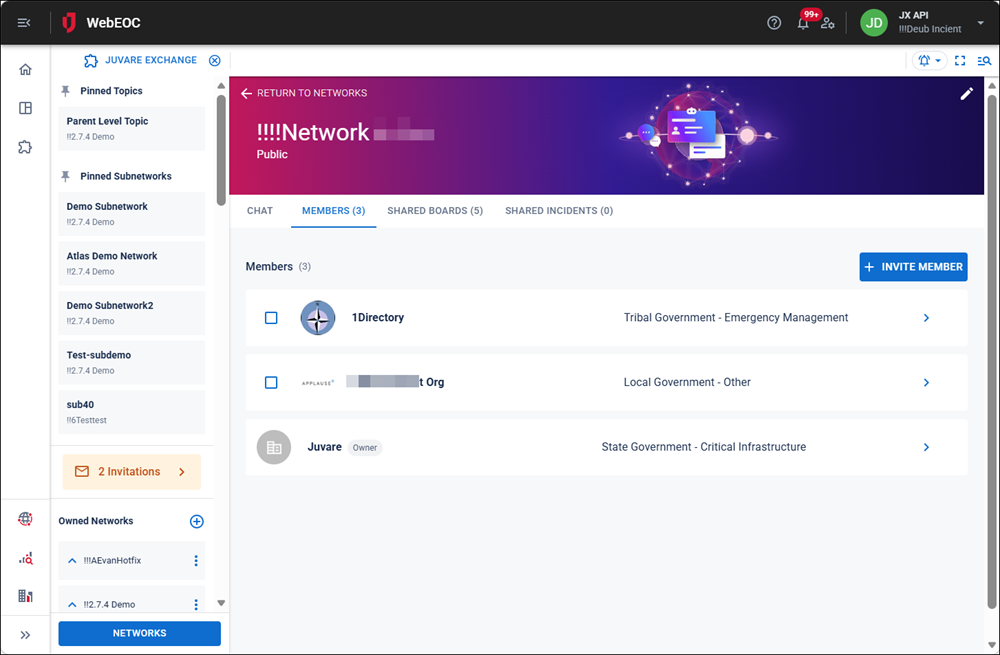
You can also access the Members tab by clicking the network’s more icon on the Side Nave and selecting View Members.
-
Do any of the following actions:
-
Click + Add Member on the upper right to search and select new members for the network, and then click Add Members.
-
Select the checkbox on the left of one or more existing members, and then click Remove.
To add members of a network on the Directory page
-
In the main menu, click the JX Directory icon
 . The Directory page opens.
 -
Locate the organization to connect with through a network and click the checkbox to the left of the row.
-
Click Invite to Network in the top right.
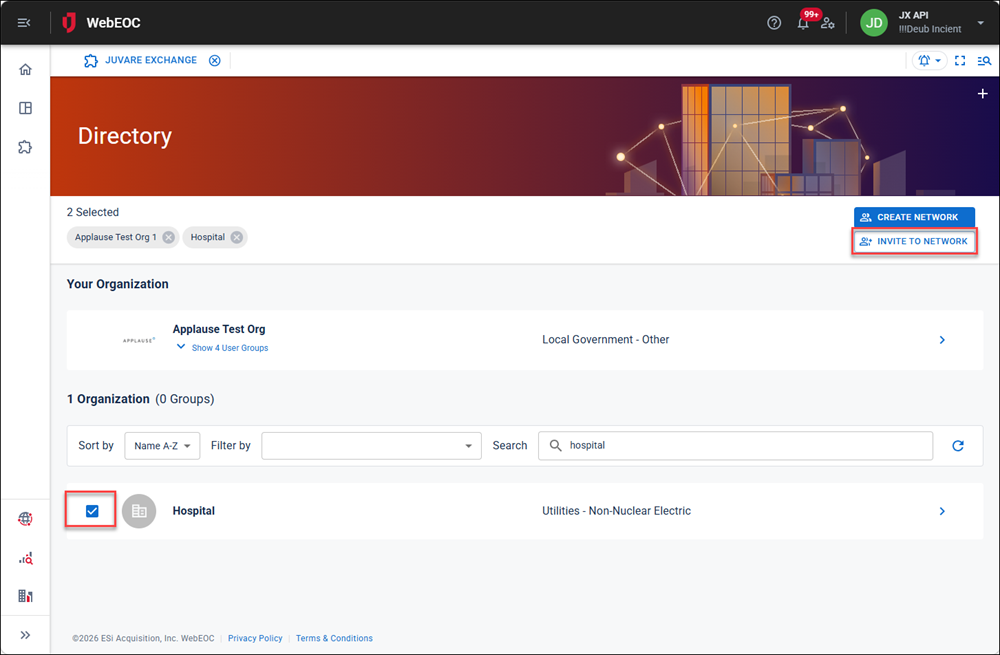
The Invite Members to Network dialog opens.
-
In the Network drop-down, select the network you want to add the organization to.
-
Click Invite Members.
To browse and join a network
-
Either:
-
In the Joined Networks area of the Side Nav, click the search icon. The Browse Network page opens.
-
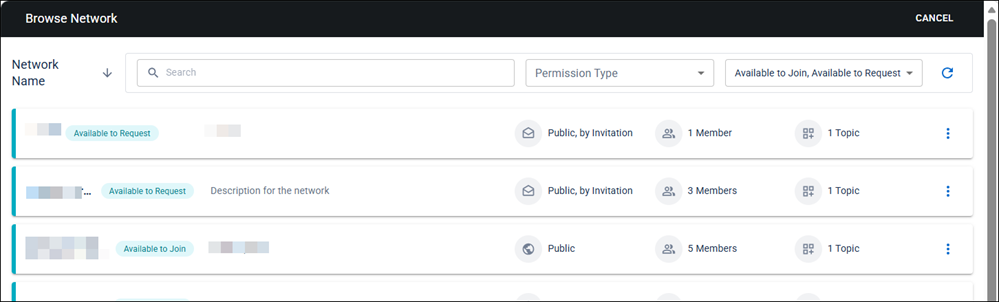
In the main menu, click the JX Networks icon. On the Networks page, click Browse Networks. The Browse Networks page opens.
-
-
Review the available networks by using:
-
Search to locate a network by name.
-
The Permission Type filter for Private, Public, or Public by Invitation networks.
-
The Invite Status menu to filter networks by your organization’s Available to Join, Available to Request, Pending, or Declined status.
-
-
Click the more icon
on the right and select Join Network for Public networks or Request to Join Network for Public by Invitation networks.
To leave a network from the Side Nav as a network member
-
In the Side Nave for a joined network, locate the network you want to leave and click the more icon
. -
Click Leave Network.
To leave a network from the Networks page as a network member
-
In the main menu, click the JX Networks icon
. The Networks page opens. -
Locate the network.
-
Click the more icon
on the row and select Leave Network.
Only members of a network can leave a network. Network owners cannot.
You can also leave a network as part of managing your organization’s details. See Update Your Organization Profile for details.