Navigate the WebEOC Nexus User View
After you log in to the WebEOC Nexus solution, the homepage for your position opens.
Your administrator configures homepages by position. Your homepage may look different depending on your active position.

In addition to serving as a landing page for WebEOC Nexus, the user's homepage includes the following elements.
| Number | Description | Procedure |
|---|---|---|

|
A main menu that contains icons that represent the WebEOC Nexus landing pages that your position's permissions allow. On the menu icon, a red dot indicates that there is an update to one or more of the landing pages in the menu.
You can remove all update indicators by Marking New Data as Read for Boards, Dashboards, Menus, and Maps.
Show/Hide the Main MenuIf the main menu is in show mode (see the To access the main menu procedure on the right), the icons that represent the landing pages remain visible at all times. To view the name of a landing page, move your pointer over the icon.
You can fully expand the menu (see the To access the main menu procedure on the right) to view the icons and their labels. When you fully expand the menu, a red number that indicates the number of updates that occurred follows the landing page name. If the main menu is in hide mode, it closes and remains closed until you show it again. |
To access the main menu
|

|
Icons that open the following areas.
|
|

|
The Profile menu contains the following options:
If your administrator gives you permission to edit your profile information, you can use the Profile menu to open the User Account page where you can modify it. See Update Your Profile Information. |
To change your position or incident
Only the positions and incidents that are assigned to you are available. To modify your profile information
To logout
|

|
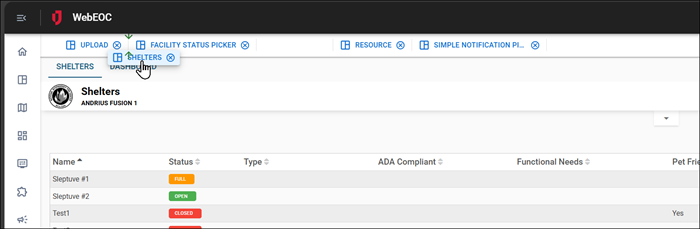
Tabs that correspond to categories you select from the main menu or landing page. When you select an option on a landing page (for example, a board), a corresponding tab appears above the page. WebEOC Nexus remembers which tabs are open. The next time you log on, the tabs are redisplayed. |
You can perform any of the following actions on the tabs:
You can also open a tab on your homepage using the more tabs menu
|

|
Your name, organization logo, and optional branding message. |
|

|
If your administrator has configured a system-wide message, all users see the message when they log on to the solution. This message remains visible until it is removed or modified in the Admin Area. |
To view the entire message Click Show More. To compact the message to its original state Click Show Less. |

|
If your administrator has configured Quick Actions, you may see up to three preconfigured shortcuts that allow you to quickly access boards, pinned notification templates, external URLs, and maps, The Quick Actions that are visible on your homepage are controlled by your administrator. |
To activate a Quick Action On your homepage, under Quick Actions, click the arrow on the Quick Action tile. Depending on the shortcut type, one of the following results happens:
|

|
If your position has permission to view boards, they appear in the Essential Boards area under the banner. The boards that appear in the Essential Boards area also appear on the Boards landing page. |
To open a board Click Go To Board at the bottom of the thumbnail.
|

|
If your administrator has enabled the Latest Messages widget, the three most recent messages from your Inbox appear in the lower portion of your homepage (not shown in the graphic above). |
To view all of the Inbox messages, click View All. Your Inbox opens in this area. To open your Inbox from any page, click the Inbox icon |

Drag and Drop Tabs
You can drag and drop tabs to improve workflow efficiency. This lets you prioritize which boards, maps, and dashboards you access first. As you drag a tab, green arrows display the position where it will land when dropped.
Tab positions are saved automatically. The customized order remains across sessions, even after logout or page refresh.
This feature is also accessibility compliant. On the keyboard, use the [ key to move a tab that is in focus to the left. Use the ] key to move a tab to the right.
You can also reorder tabs when viewing WebEOC Nexus on a mobile device.
To reorder tabs when viewing WebEOC Nexus on a mobile device
-
Tap the search menu in the top right.

-
Select Reorder Tabs. The Reorder Tabs window opens.

-
Tap and drag the tabs to reorder them.
-
When the tabs are in the correct order, tap Close.