Create a Menu
You can use the Menus Manager to group and display boards, plug-ins, links, other menus, dashboards, and maps on a single tab, accessed from the menus icon on the main menu.
To create a menu
-
In the main menu, click the workflows icon
 . The Workflows page opens.
 -
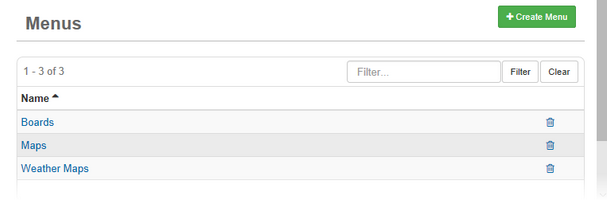
Click the Menus tab. The Menus page opens.

-
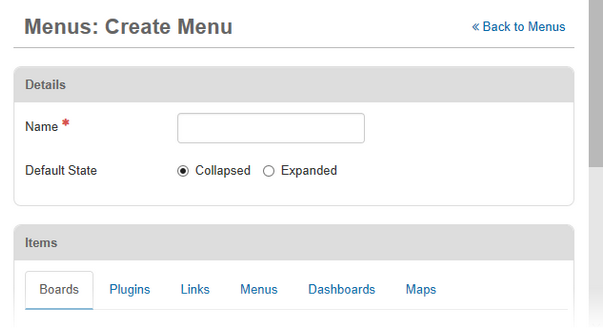
Click Create Menu. The Menus: Create Menu page opens.

-
For Name, enter a descriptive name for the menu.
The Default State options are not used in WebEOC Nexus.
-
If applicable, do any of the following actions.
 Assign boards or subscription boards to the menu
-
In the Items area, click the Boards or Subscription Boards tab, and then click Add Board or Add Subscription Board. The Add Board window opens.
-
In the Board list, select the name of the board.
-
For Default Label, enter the word or words you want to use for the board, and then click Save.
-
When you have more than one language enabled, to change the Default Label, click Add Custom. The Add Custom Label window opens.
-
In the Language list, select the language of the custom label.
-
If applicable, for Input, select the applicable Input view. Most often, Input views are assigned using board permissions and the board’s Input view is left as None.
-
In the Display list, select the display view.
-
In the Device Type list, indicate which type of device the board can be accessed from.
If the board contains filters and board permission tags, filters and tags appear under tabs in the Add Board window.
-
If it is not already selected, click the View Filters tab.
-
Select the filter or filters.
If you select multiple filters, only those entries meeting all selected criteria appear in the view.
-
Click the Board Permission Tags tab.
-
Select the checkbox for appropriate permission tags.
-
Click Save.
-
Repeat these steps for each board you want users to be able to access.
 Add a plug-in to the menu
-
In the Items area, click the Plugins tab, and then click Add Plugin.
-
For Plugin, select the applicable plug-in.
-
For Default Label, enter the word or words you want to use for the plug-in.
The Default Label field's default value is the plug-in's name.
-
When you have more than one language enabled, to change the Default Label, click Add Custom. The Add Custom Label window opens.
-
In the Language list, select the language of the custom label.
-
Click Save.
-
If applicable, assign Permissions.
Permissions do not apply to all plug-ins.
-
Click Save.
 Add a link to the menu
-
In the Items area, click the Links tab, and then click Add Link.
-
In the Link list, select the link.
-
For Default Label, enter the word or words you want to use for the link.
-
To change the Default Label, click Add Custom. The Add Custom Label window opens. In the Language list, select the language of the custom label.
-
Click Save.
 Add another menu to the menu
-
In the Items area, click the Menus tab, and then click Add Menu.
-
From the Menu drop-down list, select the applicable menu.
-
For Default Label, enter the word or words you want to use for the menu.
-
To change the Default Label, click Add Custom. The Add Custom Label window opens. In the Language list, select the language of the custom label.
-
Click Save.
 Add a dashboard to the menu
-
In the Items area, click the Dashboard tab, and then click Add Dashboard.
-
In the Dashboard list, select the dashboard.
-
For Default Label, enter the word or words you want to use for the dashboard.
-
To change the Default Label, click Add Custom. The Add Custom Label window opens. In the Language list, select the language of the custom label.
-
Click Save.
 Add a map to the menu
-
In the Items area, click the Maps tab, and then click Add Map.
-
In the Maps list, select the map.
-
For Default Label, enter the word or words you want to use for the map.
-
To change the Default Label, click Add Custom. The Add Custom Label window opens. In the Language list, select the language of the custom label.
-
On the Board Permission Tags tab, select the checkbox for the appropriate permission tags.
-
Click Save.
-
-
Click Save.
After you add a new menu, you need to set access privileges to it using the Groups Manager. As a recommended best practice, to give users access to the menu, assign the menu to a feature group.