Import Users
The User Importer makes it easy to manage hundreds or thousands of WebEOC Nexus user accounts. To add new users to WebEOC Nexus, enter the information for each user in a Microsoft ® Excel® spreadsheet template, and then import the spreadsheet into WebEOC Nexus. WebEOC Nexus user accounts are automatically created for new users listed in the spreadsheet, complete with their user settings such as username, password, account type, location, email address, permission settings, and so on.
You can also update existing user accounts using the same method. If a user listed in the spreadsheet already exists in WebEOC Nexus, the user's account is updated with the data from the imported file. User information can be re-imported as many times as necessary.
This feature is a licensed premium feature. To use this feature, contact your Client Success Manager (CSM) to enable it.
To import new users, modify existing users, or remove users
-
In the main menu, click the accounts icon
 . The Accounts page opens.
 -
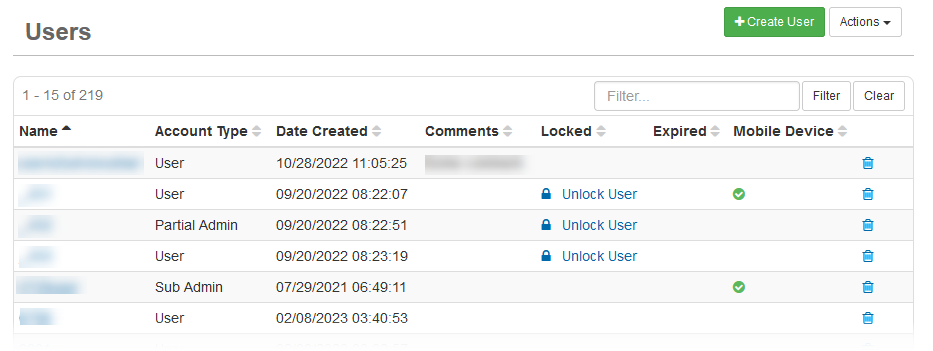
On the Users tab in the upper right, in the Actions menu, select User Importer. The User Importer page opens.
-
Click Download Template. An Excel spreadsheet downloads.

-
For each user, complete the fields. See the following table for field descriptions.
-
The following fields are mandatory:
-
User Name, Password (new users only), Account Type, and Primary Email when basic authentication is used to log in to the system or WebEOC Nexus plug-in.
-
User Name, Account Type, Primary Email, First Name, and Last Name when Juvare Login Services is used to authenticate to the system, or OIDC is set up in the system. The user's Primary Email and Authentication ID (if it is added) must be unique.
-
-
Columns you do not include in the spreadsheet do not affect any existing data in WebEOC Nexus. This helps ensure you update only the user information you want to change.
Fields in spreadsheet to import users Field name
Possible values
Max length
Description
User Name
Any
100
User name used to log in to WebEOC Nexus.
Password
Any
150
User password used to log in to WebEOC Nexus.
- The Password field is only required for new users when basic authentication is used to log in to the system or WebEOC Nexus SSO plug-in. If the user is an existing user that already has a password, entering a new password overwrites the existing one when the spreadsheet is imported.
-
Passwords are case sensitive.
Authentication ID
Any
100
User Identification when the OIDC authentication method is set up in the system or the SSO plug-in is used. For example, email, security, or any other ID that identifies the user.
Account Type
User, Full Administrator, Service, Service as Administrator
N/A
Type of user account.
Multiple User Login
True, False
N/A
Indicates if multiple logins with the same username are allowed.
Account Disabled
True, False
N/A
Indicates if the account will be disabled after it is imported.
Change Password at Next Login
True, False
N/A
Indicates if the user will be asked to change their password at their next login.
Allow Session to Expire
True, False
N/A
Indicates if the session will expire due to inactivity.
Primary Email
Any
100
Primary email of the user.
Secondary Emails
Any
100 per email
Secondary user emails. Separate email addresses with commas.
Color
Hex number or color name
N/A
Color associated with the user. Possible values are:
-
RGB values in hexadecimal format. For example, #CC66CC
-
Color name
Disable User Update
True, False
N/A
Prevents the user from modifying the following user account fields:
Full Name
Any
100
Full name of the user.
First Name
Any
100
First name of the user.
This field is required when authentication using Juvare Login Services (JLS) is enabled or OIDC is set up.
Last Name
Any
100
Last name of the user.
This field is required when authentication using JLS is enabled or OIDC is set up.
Location
Any
100
Location of the user.
Office Phone
Any
50
Office phone number.
If the phone number uses the same country code as the default country code, you can enter the number with or without the country code. However, if the country code is different from the default country code, enter the country code to ensure that the validation is successful.
Office Phone Default
True, False
N/A
Indicates if the office phone number is the default phone number.
Office Phone Default and Mobile Phone Default are mutually exclusive. Only one of the two can be set to true.
Mobile Phone
Any
50
Mobile phone number.
If the phone number uses the same country code as the default country code, you can enter the number with or without the country code. However, if the country code is different from the default country code, enter the country code to ensure that the validation is successful.
Mobile Phone Default
True, False
N/A
Indicates if the mobile phone number is the default phone number.
Mobile Phone Default and Office Phone Default are mutually exclusive. Only one of the two can be set to true.
Department
Any
200
Department associated with the user.
Organization
Any
200
Organization associated with the user.
Supervisor
Any
200
Name of the user's supervisor.
Positions
Any
500 per position
Comma-separated list of positions the user should be assigned to during the import. You can control the permissions of many users at once by including the WebEOC Nexus position assignments for each user. Separate multiple positions with a comma.
Positions listed in this field must exist in WebEOC Nexus prior to importing the record.
Comments
Any
4000
Comments about the user account.
Expiration Date
Date
N/A
Date when the user's account expires.
Supervisor Email
Any
100
Email for the user's supervisor.
Supervisor Phone
Any
50
Phone number for the user's supervisor.
If the phone number uses the same country code as the default country code, you can enter the number with or without the country code. However, if the country code is different from the default country code, enter the country code to ensure that the validation is successful.
Remove
True, False
N/A
Remove's the user's account. To remove an account, include the User Name for each account you want to remove, and enter TRUE in the Remove column for that account. You do not need to include any other fields or data for these accounts.
-
-
After you have completed the spreadsheet, return to the User Importer page, and then click Browse to upload the spreadsheet.
-
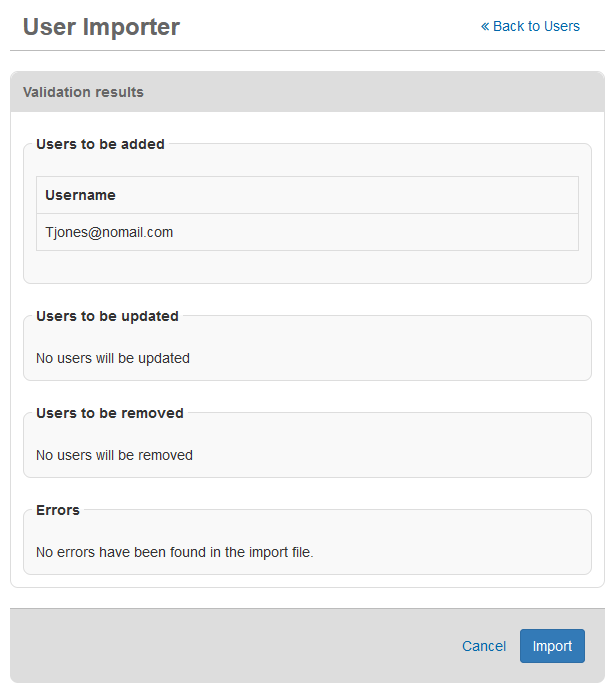
Upload the spreadsheet, and then click Next. A validation summary is displayed.
-
If everything is correct, click Import. The users are imported and a message indicates that the import was successful.
-
You cannot undo user removal. To ensure you are removing only the appropriate user accounts, pay special attention to the validation results; double-check the users to be removed section to make sure it contains only those users you want to remove.
-
If there are errors in the validation, you can still import the spreadsheet; however, the users with errors are not imported. For more information about import errors, see Import Errors.
-
-
Click Return to return to the User Importer page.
Related Concepts
Related Tasks


