Add a Subscriber Account
You can add a subscriber account in full, but you can also use the Quick Create feature to add an account with minimal details on the spot. In the Quick Create window, you only need to supply the subscriber's username and specify whether the subscriber should have Incident and Boards publishing permissions. Further information regarding the account may be required later, but use of Quick Create adds a bare-bones account subscribers can use right away.
To add a subscriber using Quick Create
-
Log in to WebEOC Fusion.
-
In the Administration tab of the Admin window, click the Subscribers subtab.
-
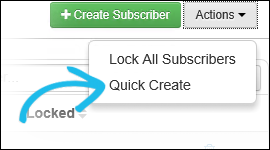
On the Subscribers page, click the Actions button in the upper right corner and select Quick Create.
-
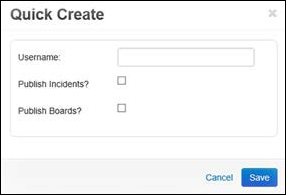
In the Quick Create window, enter a username to identify the subscriber account.
-
Select the checkbox next to the items you want this subscriber (WebEOC server) to be able to publish to: Boards and/or Incidents.
If you do not select an item, the subscriber can only view the data for that item.
- Click Save. A URL populates in the Quick Create window.
- Click Close.
To add a subscriber account
-
Log in to WebEOC Fusion.
-
In the Administration tab of the Admin window, click the Subscribers subtab.
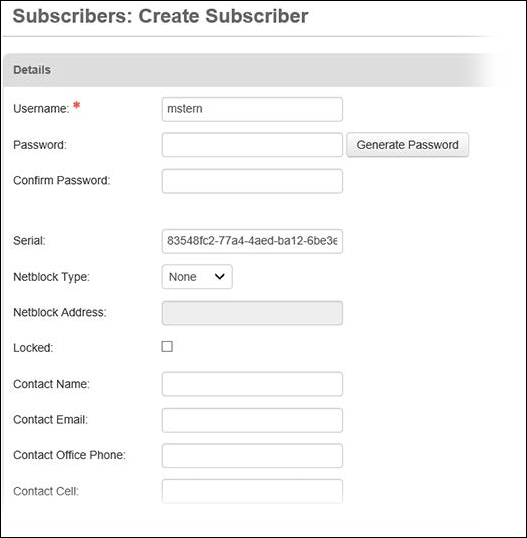
On the Subscribers page, click Create Subscriber. The Subscribers: Create Subscriber page opens.
-
Enter a name for the subscriber account in the Username field.
This name is displayed to all WebEOC installations on the WebEOCFusion network. Select a name that will be clear to other WebEOC administrators on the network.
-
Enter a password in the Password field, and reenter the same password in the Confirm Password field. The password must comply with the following standards:
-
Your password must be at least eight characters in length and contain at least one upper case letter, one lower case letter, and one number.
-
You cannot reuse a password for the specified number of times configured in the Password History field of your WebEOC Fusion system.
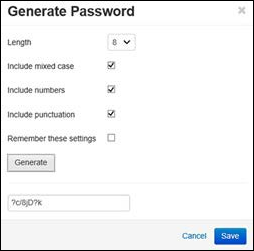
To ensure the password meets requirements, click Generate Password. In the Generate Password window, complete the fields and select the checkboxes as appropriate. Click Generate. The system provides a password for the subscriber in the field at the bottom of the window that meets all set requirements.
- Verify that a serial number is automatically generated in the Serial field.
Note the serial number assigned to the subscribing WebEOC server as this serial number is used during configuration on the WebEOC server.
-
Select Address, None, or Subnet from the Netblock Type drop-down list.
-
Selecting Address restricts usage of this credential to a server with a full IP address. You must now enter the full IP address in the Netblock Address field.
-
Selecting Subnet restricts usage of this credential to a server with an IP subnet. You must now enter the three octet network address in the Netblock Address field.
-
Selecting None allows you to skip the Netblock Address field.
-
-
Select the Locked checkbox only if you want to lock this account.
Locking an account prevents the subscriber from polling Fusion and requires the subscriber to re-enable the PullService.
-
Enter a contact name in the Contact Name field.
-
Enter a contact email in the Contact Email field.
-
Enter a contact office phone number in the Contact Office Phone field.
-
Enter a contact cell phone number in the Contact Cell field.
-
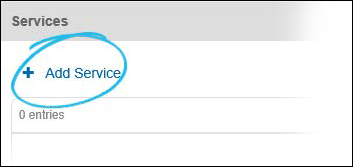
In the Services section, click Add Service.
-
In the Add Service window, select Subscription Boards Service from the Service drop-down.
-
Select the checkbox next to the items you want this subscriber (WebEOC server) to be able to publish to: Boards and/or Incidents.
If you do not select an item, the subscriber can only view the data for that item.
- Click Save to save the subscriber account.
Related Concepts
Reference Materials
Related Tasks
Edit an Existing Administrator Account