Add Items to Checklist
The Checklist board is the preferred tool for creating and using checklists. Use it instead of the Checklists Manager.
WebEOC Nexus allows you to add items or steps to a checklist and establish time requirements users must meet when completing these tasks. Steps can be ordered and reordered, and substeps can be assigned.
To add an item to a checklist
-
In the main menu, click the integrations icon
 . The Integrations page opens.
 -
Click the Checklists tab.

-
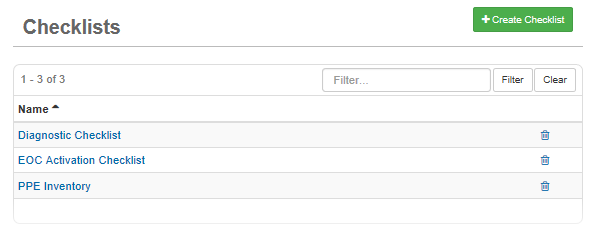
On the Checklists page, click the name of the appropriate checklist.
-
On the Checklists: Edit Checklist page, click Create Item.
-
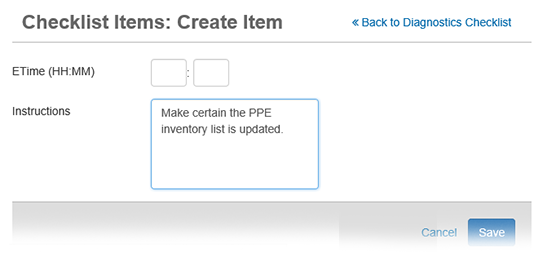
On the Checklist Items: Create Item page, for ETime, enter the amount of time necessary to complete this checklist task (HH:MM).

-
ETimes are not required. If an ETime is not configured, a zero value is automatically inserted into the hours and minutes fields and items will not become past due.
-
ETimes are calculated from the incident time configured in the Incidents Manager. If an ETime is assigned, the step status turns red on the user side when it becomes past due. For example, an incident is created with an incident time of 18:30. A checklist step is configured with an ETime of 30 minutes. If the step has not been marked completed, previously accomplished, or not applicable by 19:00, it turns red on the user side.
-
-
Enter Instructions.
-
Click Save.