Create a Map File
When you create a map in MapTac, you decide the group or groups that have access to the map or image. If groups are not assigned, the map is not available in MapTac. After creating the map, you do have the option of assigning additional groups or editing the groups you assigned.
To create a map file
-
In the main menu, click the integrations icon
 . The Integrations page opens.
 -
Click the MapTac tab. The MapTac page opens.

-
Click Create Map.
-
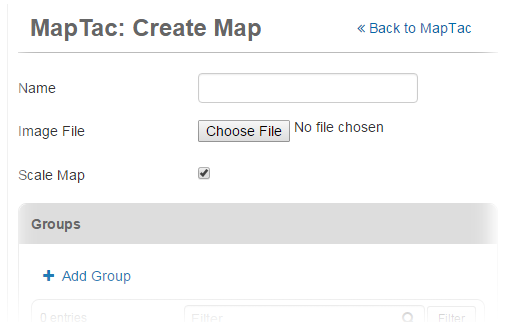
Enter a name for the map.
-
This name appears in the Maps drop-down list in MapTac user’s window.

-
-
For Image File, click the Browse or Choose File button.
-
Locate your map file and click Open.
-
If you want to scale the image to fit the MapTac display window, select the Scale Map checkbox.
This option cannot be changed after the map is saved. TIf you want to maintain the correct aspect ratio of an image, we recommended that you do not allow scaling for large, high resolution images such as digital photos.
-
Select one or more groups to assign to the map.
-
To add a group to the list, click Add Group.
-
To remove a group by selecting it and then clicking the Remove button.
-
-
Click Save.
Related Concepts
Related Tasks