Launch a New Mission
Missions provide information about how to respond to potential deployment situations and help keep track of volunteers and their hours. As an administrator, you can launch new missions.
After creating a mission, add shifts to let the volunteers know when and where their help is needed. A mission with at least one shift can be mobilized. After a mission is mobilized, its status is Active and its launch is complete.
To launch a new mission
-
On the main menu, select Missions. The Missions page opens.
-
Click Launch a New Mission. The Launch a New Mission page opens.
-
Enter the following information:
Mission launch actions Field Description Mission name
A descriptive name for the mission.
Mission type
The type of mission you want to deploy. The options are the following:
-
Federal/National: Volunteers are coordinated for a federal or national event.
-
Local: Volunteers are coordinated for a local event.
-
Local Non-Emergency: Volunteers are coordinated for a local event that doesn't require immediate action.
-
State: Volunteers are coordinated for a state-wide event.
-
State Non-Emergency: Volunteers are coordinated for a state-wide event that doesn't require immediate action.
These are the default mission types. Client admins can make changes to these options in Configurations.
Description
A detailed description of the mission and the expected outcomes.
-
-
Click Next.
-
Enter the following information:
Contact fields Field Description Name
The full name for the mission's main contact.
Email
The email address for the mission's main contact.
Phone
The phone number for the mission's main contact.
-
Click Next.
-
Click one of these options.
-
Public (Everyone): Anyone within the volunteer database can volunteer for this mission.
Only qualified volunteers are able to see the mission.
-
Specific Organization: Accounts within specific selected organizations can volunteer.
The Select Organizations page opens.
-
On the Select Organizations page, select the checkbox for each organization you want to include in the mission.
-
On the upper right, click Select.
-
-
Group: Accounts within specific selected groups can volunteer.
The Select Group page opens.
-
On the Select Group page, select the checkbox for each group you want to include in the mission.
-
On the lower right, click Select.
-
-
-
Click Submit.
-
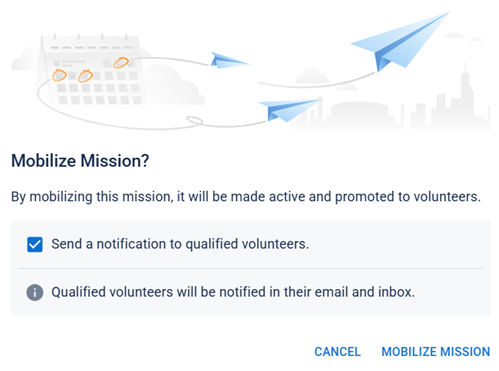
Click Mobilize Mission. A confirmation window opens.
-
Enable or disable mobilization notifications. If enabled, a notification is sent to qualified volunteers when the mission is mobilized. If disabled, volunteers can view the mission but won't be notified.

-
Click Mobilize Mission. The mission is now launched and visible to potential volunteers.