Manage Missions
As an administrator, you can view and manage mission details by clicking on any of the missions in the Missions page.
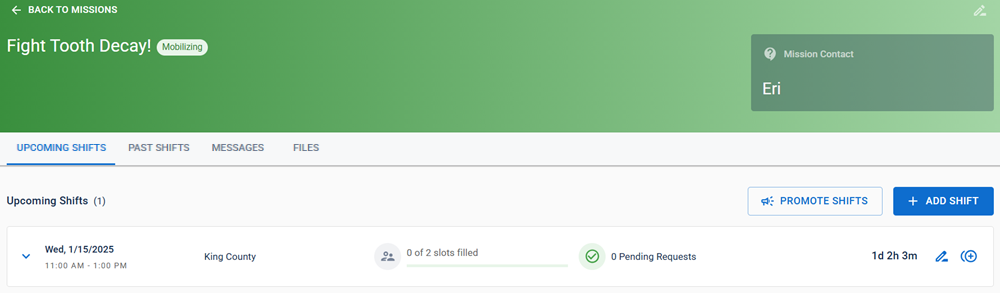
The mission details page provides information in one of four tabs:
-
Active Shifts: displays all current and scheduled shifts that have been added to this mission.
-
Inactive Shifts: displays all mission shifts that have ended or been canceled.
For more information on managing shifts, including duplicating past shifts, refer to Manage Shifts.
-
Messages: allows you to send messages to volunteers associated with this mission. For more information on how to send notifications, refer to Create a Notification.
-
Files: allows you to view a file library that is embedded in the mission. These files are associated with the mission, for example, time tracking files, plans, and mission detail files. These files cannot be accessed from within the File Library page, as they are only applicable to the mission.
Uploading a file works in the same way as the File Library.
-
On the mission details page, click Upload File.
-
Do one of these actions.
-
Drag one or more files from your computer to the Upload File dialog.
-
Click Browse Files and do these actions.
-
Select one or more files.
-
Click Open.
-
-
-
For each file, enter a Summary to describe the file.
-
Click Upload.
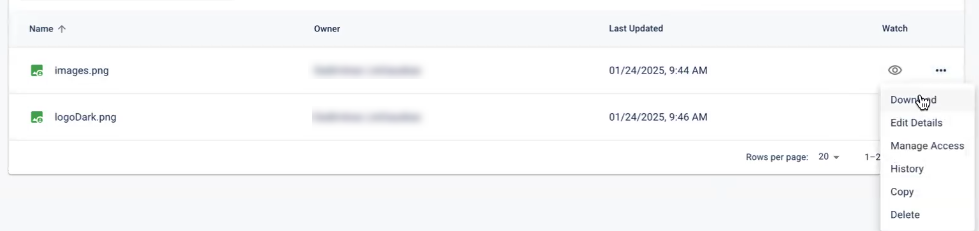
You can manage the mission files in the same way as you would in the File Library. For more information, refer to Manage a File or Folder.
Until access is given to a mission file, volunteers won't be able to view the file in the Files tab. You need to manage the access for each of the files uploaded.
-
Click the triple dots
 icon and select Manage Access from the menu. The Manage Access dialog appears.
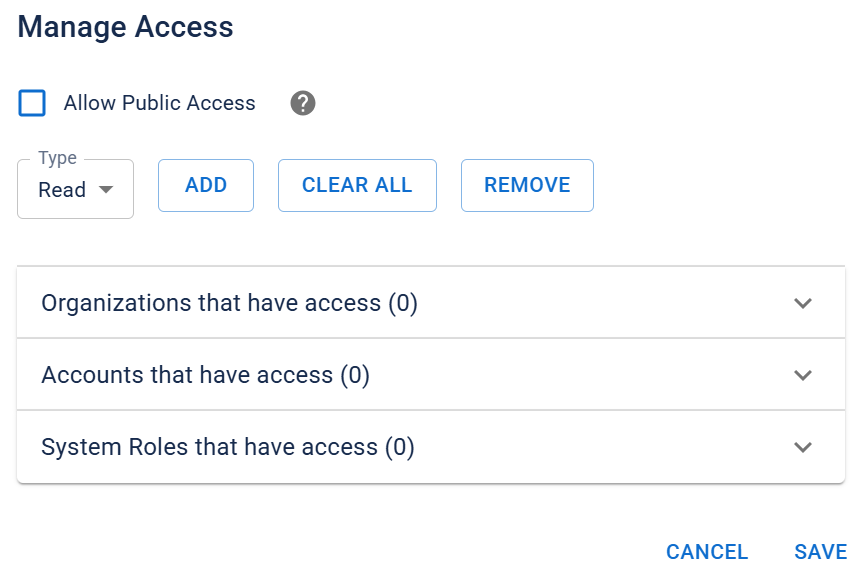
-
Set the Type field to the level of permissions accounts should have on the file from read, write, modify permissions.
-
Click Add to grant access to organizations, specific accounts, or system roles.
If you want to change the account permission type for the file after you've added it, expand the Accounts that have access list then modify the menu field next to the account.

-
Click Save.
-
On the mission details page for an active mission, click the edit
 button in the upper right.
 -
Edit the details of the mission, including:
-
Mission name
-
Mission type
-
Description
-
Mission contact details
-
Who the mission is intended for
-
-
Click Submit.
-
On the mission details page for an active mission, click Archive. The Archive Mission dialog appears.
-
If the mission has any active or scheduled shifts, pending volunteer requests, or pending volunteer hours, you will not be able to archive the mission. The dialog notifies you if there are any errors and allows you to manage the shifts and hours.
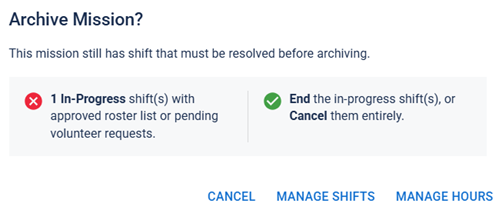
If the mission does not have any of these errors, you will be asked to confirm the archival. Toggle the archival statement.
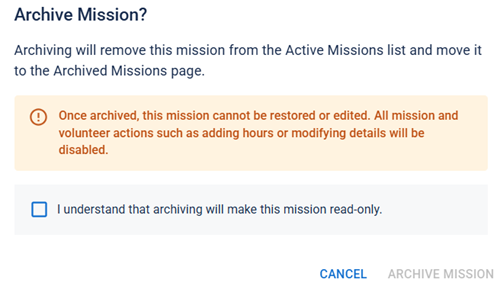
You cannot restore or edit an archived mission, and all mission and volunteer actions will be disabled. Ensure that you are ready to archive a mission before continuing.
-
Click Archive Mission.
The mission will be moved to the Archived Missions tab on the Missions page.
-
On the mission details page for an archived mission, click the delete
 button in the upper right. The Delete Mission dialog appears.
 -
Deleting a mission permanently removes it from CORES RMS, as well as all data related to it.
This cannot be undone. The mission and all its data, including shifts, volunteer rosters, and recorded hours is permanently deleted and cannot be recovered.
-
Click Delete Mission.
The mission is removed from the Archived Missions tab and can no longer be accessed.