Create Shift Template
A shift template to save reusable shift information that can be used when adding shifts to a mission Shift A scheduled period during which users perform work for a mission.t templates store commonly used shift details, such as positions, check-in address, contact The internal and external people that participate in, might be affected by, or need to be notified about an incident. information, permissions, and sharing settings, allowing you to quickly create new shifts using pre-populated information.
Create a shift template
-
On the main menu, select Missions. The Missions page opens.
-
Select the Shift Templates tab.
-
Click Create Shift Template. The Create Shift Template page opens.
-
Enter the following information:
-
Click Next.
-
Click Choose Position and select a position.
-
For Quantity, enter the number of volunteers
A user who can participate in missions, request shifts, and record volunteer hours. needed for that position.If the positions available are not suitable for what you need, you can create a new mission.
-
Click Create Position. The Create Mission Position
A role that defines the qualifications required for assignment during a mission. dialog opens. -
Complete the required information.
For information about creating a position or available fields, refer to Manage Mission Positions.
-
Click Create.
The list of mission positions is editable by admins under the Configurations page.
-
Click +Additional Position to add additional positions.
-
Click Next.
-
Perform one of these actions:
Use an existing address for the shift check-in
-
Select Use existing address.
-
Click Select address to select an address.
Add a new address for the shift check-in
-
Select Add new address.
-
For Name, enter the name of the facility or venue.
-
For Location Type, click to select one of the options.
-
Enter a complete address.
-
-
Click Next.
-
Enter the following information about the shift's main contact.
-
Click Next.
-
Select one of these options.
-
Click the display shift contact slider to display the shift's contact information to potential volunteers.
-
Click the display number of positions needed slider to show how many positions are needed to potential volunteers.
-
Click Next.
-
Click Add Access to grant template access.
-
Enable General Access if needed.
-
Select the appropriate Accounts
Used to track and manage users. Accounts differ from your profile, which is used to modify personal settings for using the solution., Organizations Official entities, such as public health authorities, healthcare agencies, and corporations., or Roles. -
Select the required access type.
Use the Search box to locate specific accounts, organizations, or roles. Use the Access Type filter to display entries by access level.
-
Click Create Shift Template.
| Option | Action |
|---|---|
|
Shift Name |
Name of the shift template. |
|
Repeat shift |
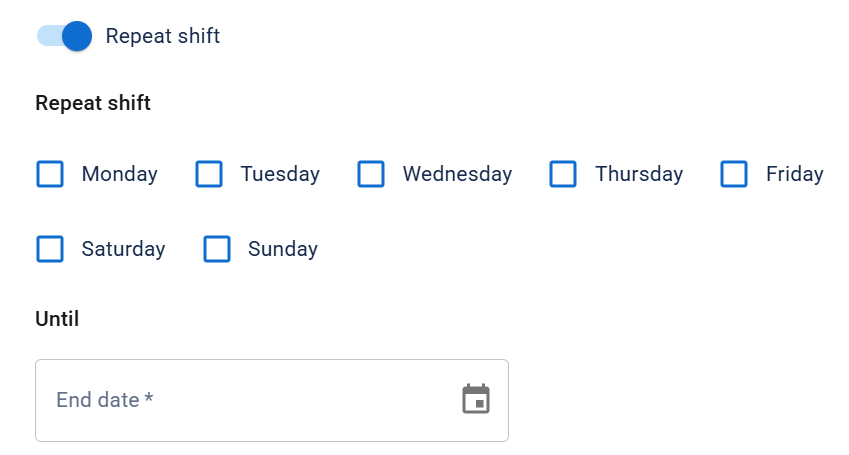
Days on which the shift repeats when Repeat Shift is enabled, toggle to select on what days you want the shift to be repeated and until what date this repetition continues.
|
| Field | Description |
|---|---|
|
Name |
Full name. |
|
|
Email address. |
|
Phone |
A valid phone number that is at least 10 digits. |
| Option | Description |
|---|---|
|
Full address |
Potential volunteers can see the full address for the shift's check-in location. |
|
City only |
Potential volunteers can only see the city for the shift; after volunteers are approved for a shift, they can see the full check-in location. |
|
County only |
Potential volunteers can only see the county for the shift; after volunteers are approved for a shift, they can see the full check-in location. |