Zabbix
To set up and configure Zabbix, follow the instructions by expanding the headings below.


-
Log in to Zabbix and navigate to Administration then Media types.

-
Click import in the upper right. The Import dialog opens.

-
Click Choose file.
-
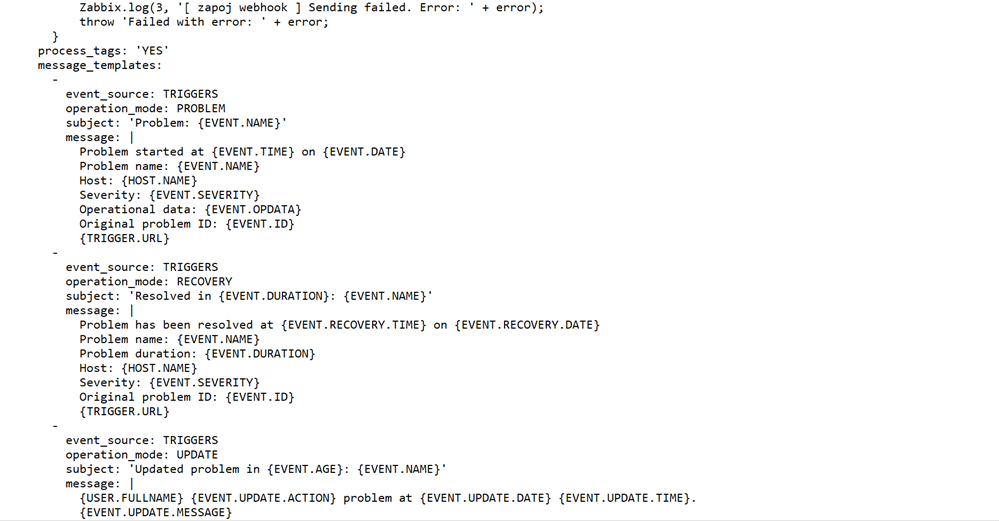
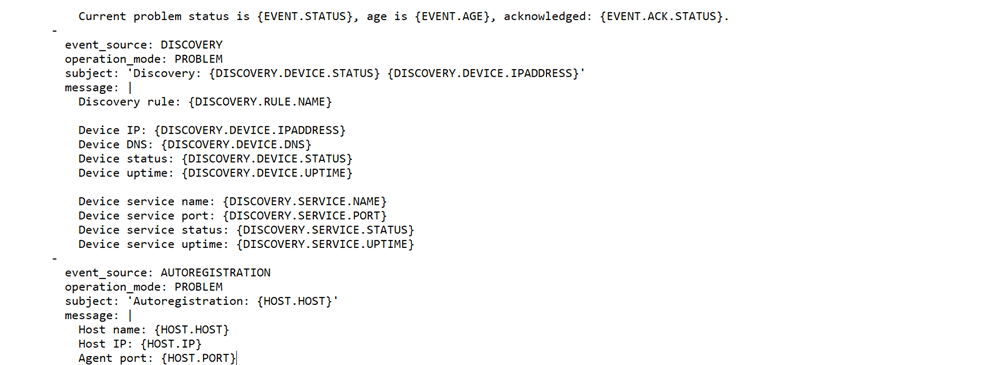
Create a YAML file with the below script and choose the file in the import dialog. It will create the new media type in the list of media types
If you want to change the name of the media type, update the
media types: namein the script.


-
Click the new media type you uploaded and paste the integration URL in the URL parameters, then click Update.
You can create multiple media types based on your requirements. For each service, you can create one media type, give it a service name, and assign the required media types to users.

-
To test the media type, click Test in the upper right of media type then click the Test button.

-
Navigate to Configuration then Actions then Trigger Actions from the menu and add this media type to the trigger actions.

-
Click Create action or click on one of the already created actions in the list.

-
Create the conditions based on the information displayed in the below table.

-
Give the required details and conditions in which you want to get the alerts then click the Operations menu on the right of the action menu.

-
Under the operations test area, click Add. A new dialog opens.

-
Add at least one user group or one user to the operation details then select Send only to in the select menu. The list of media types appears.
-
Select your created media type.
After creating the action, you will see the new action appears in the list. Whenever any are triggered, you receive this informationin Juvare ARC.
-
Now you can create rulesets based on the data you are receiving in Juvare ARC.

-
Navigate to the Administration then Users page, append the media type at and at media menu for each user.

-
In each service ruleset, add this rule condition as shown in the image below.
