After you create a Delete view, assign it to a List view. Delete views are always associated with List views because the List view is what the user interacts with when they view, add, and edit board records. For additional information about views, see Views.
If you are working in Nexus Component Styling, assign the Delete view using the List View Settings component.
To assign a Delete view to a List view
-
In the Board Gallery, locate the board for which you want to associate views and click Design.
-
In the Explorer, select the List view.
-
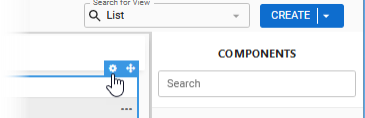
On the canvas, click inside the list. A border appears around the list.
-
On the upper right, click the settings icon.
-
On the List View Configuration page, from the Associated Delete View list, select the Delete view.
-
Click Next, and then click Submit.
-
Click Save
 . The delete confirmation message appears when a user attempts to delete a record for this board in WebEOC.
Related Concepts
Create a List View Classic Styling
Create a List View Nexus Component Styling
Related Tasks
View Child Data with the Child Table Component Classic Styling
Build a View Filter For a Display View
Add Tabs to Switch Between Views
Create a Details View Classic Styling
Create a Details View Nexus Component Styling
Create a History View Nexus Component Styling
Add a Filter and/or Search Button to a List View Classic Styling
Edit a Collapsible Embedded Map Classic Styling
Update the View Header for a List View Nexus Component Styling
Table Fields Settings Component Nexus Component Styling
Map Configuration Component Nexus Component Styling
List View Settings Component Nexus Component Styling
Status Indicators Component Nexus Component Styling
Create a Board Using the Board Wizard
Preview Boards on Multiple Devices
Preview Boards in Light and Dark Modes
View History and Restore Versions
Reference Materials